How to Configure and Run Jmeter Script by Jenkins for Windows and Ubuntu
- Quality Engineering
How to Configure and Run Jmeter Script by Jenkins for Windows and Ubuntu
Step-1 Firstly, Download and Install the Jenkins.
- Download latest version from Jenkins official site https://jenkins.io/download/
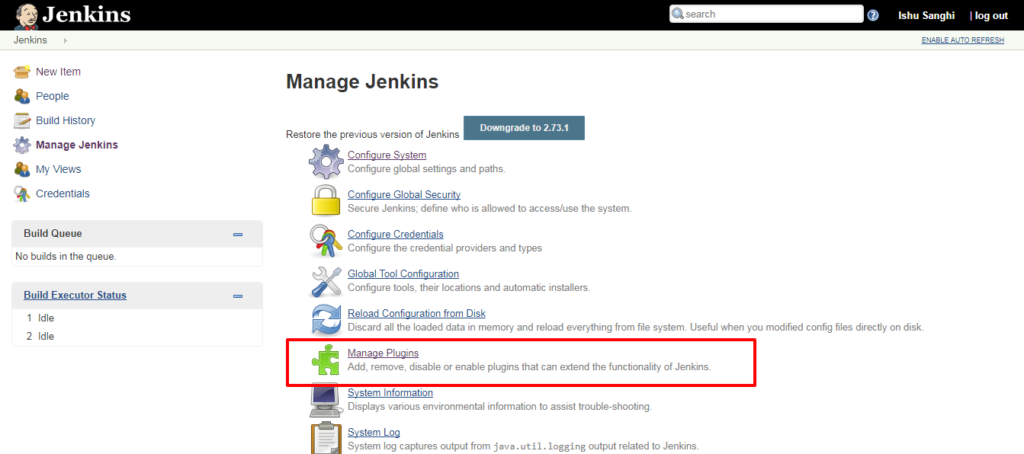
The next step is to download the Performance Plugin for Jenkins.
- To download Performance Plugin click on Manage Jenkins, then click on Manage Plugins.
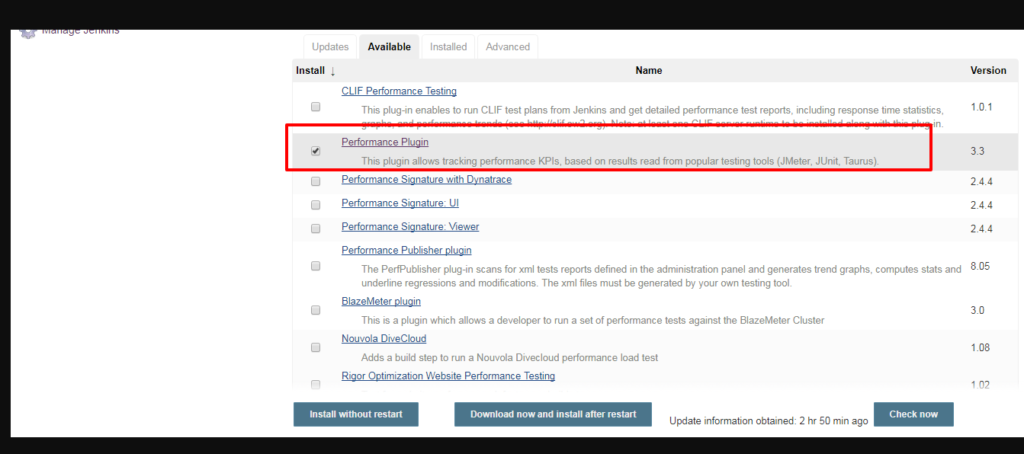
- The next step is click on Available and then search Performance Plugin.
- Then select the plugin and click on Download now and Install after restart.
Step-2 The next step is go to Jmeter/bin and add line jmeter.save.saveservice.output_format=xml in user.properties.
Step-3 Then in next step create a Jmeter test.
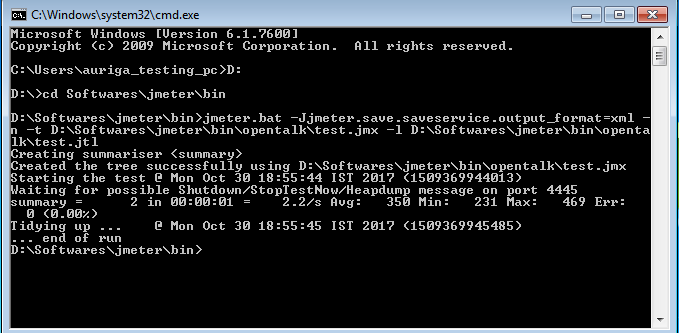
Step-4 Run the Jmeter test in Command Prompt.
- Open the Command Prompt and go to jmeter\bin
- Then write the below command and run.
For Windows-
jmeter.bat -Jjmeter.save.saveservice.output_format=xml -n -t D:\Softwares\jmeter\bin\opentalk\test.jmx -l D:\Softwares\jmeter\bin\opentalk\test.jtl
For Ubuntu-
sh jmeter.sh -Jjmeter.save.saveservice.output_format=xml -n -t /Users/Desktop/test.jmx -l /Users/Desktop/test.jtl
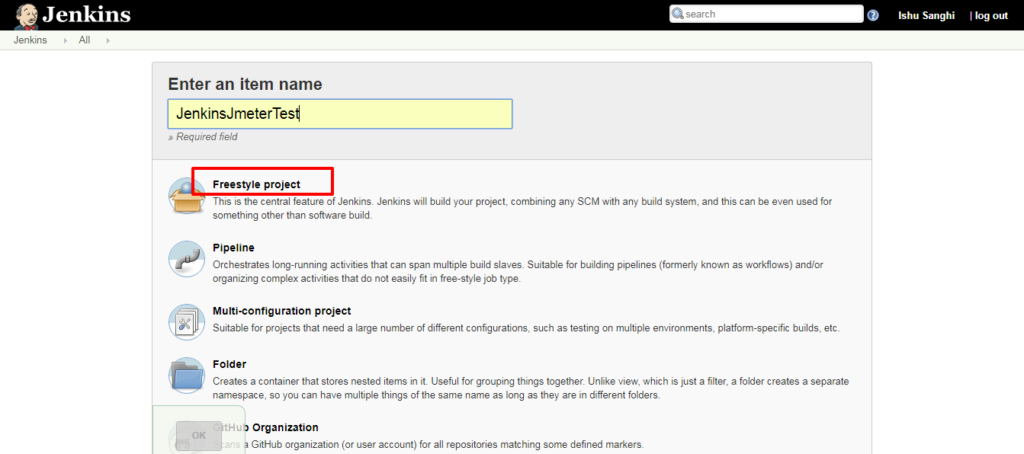
Step-5 Then add a job in Jenkins.
- Click on New Item. Name the project as JenkinsJmeterTest and select the type as Freestyle Project.
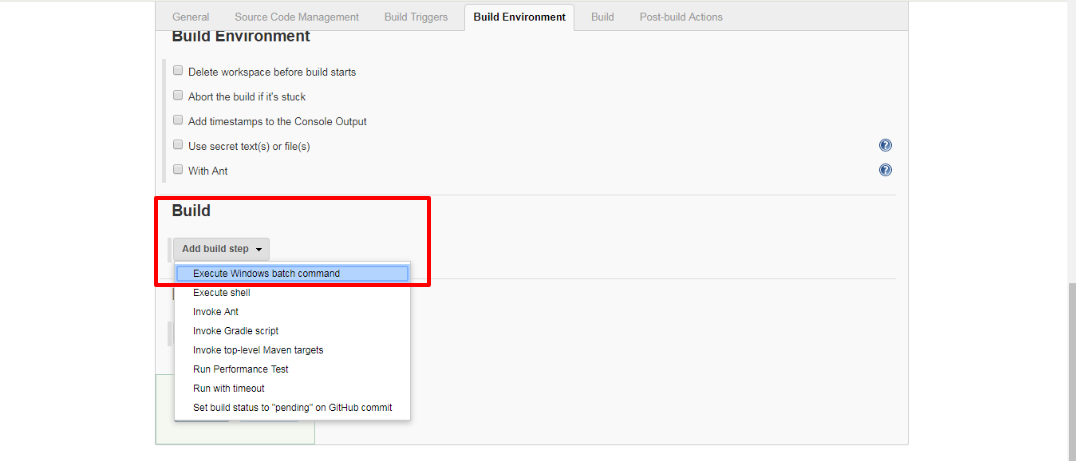
Step-6 Add Build step
Step-6.1 For Windows
- To do so click on Build, then select Execute Windows Batch Command.
- Then in Command area write
D:\Softwares\jmeter\bin\jmeter.bat -Jjmeter.save.saveservice.output_format=xml -n -t D:\Softwares\jmeter\bin\opentalk\test.jmx -l D:\Softwares\jmeter\bin\opentalk\test.jtl

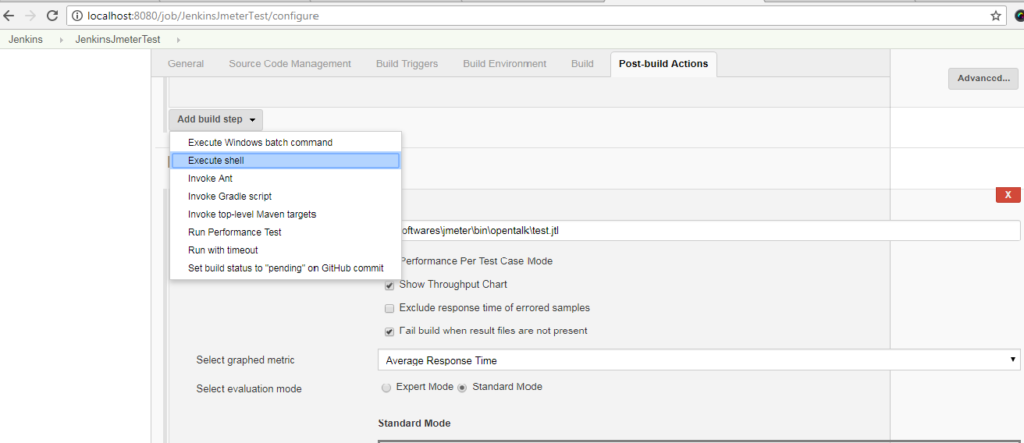
Step-6.2 For Ubuntu
- To do so click on Build, then select Execute Shell.
- Then in Command area write
cd /Users/Desktop/jmeter-3.0/bin/
sh jmeter.sh -Jjmeter.save.saveservice.output_format=xml -n -t /Users/Desktop/test.jmx -l /Users/Desktop/test.jtl
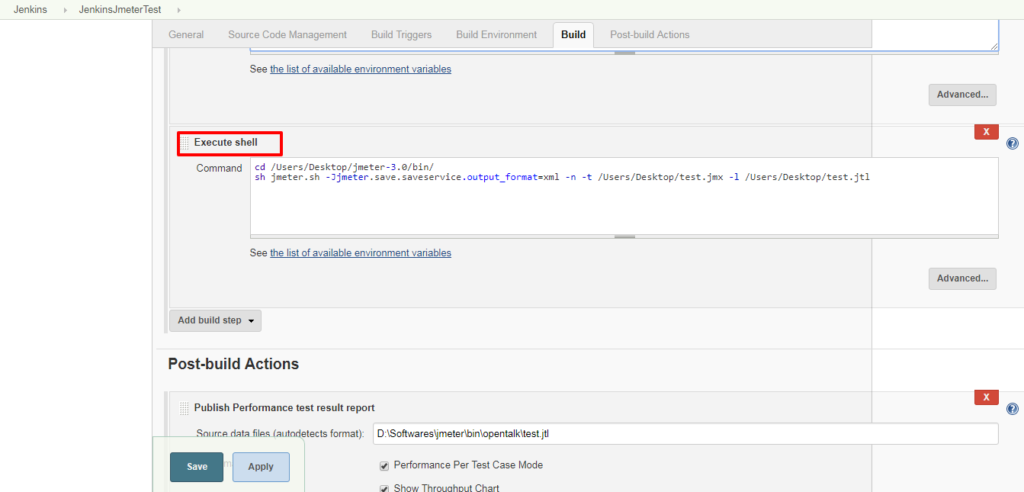
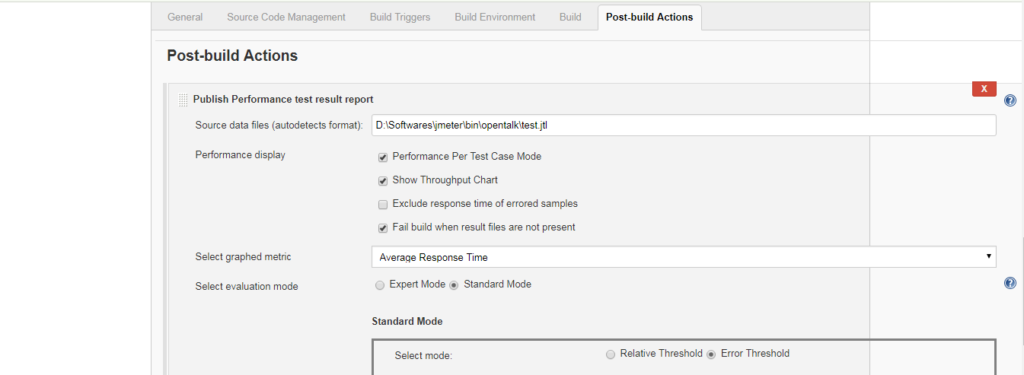
Step-7 Then in Post Build Actions select Publish Performance Test Result Report.
Fill the details accordingly.Then click on save.
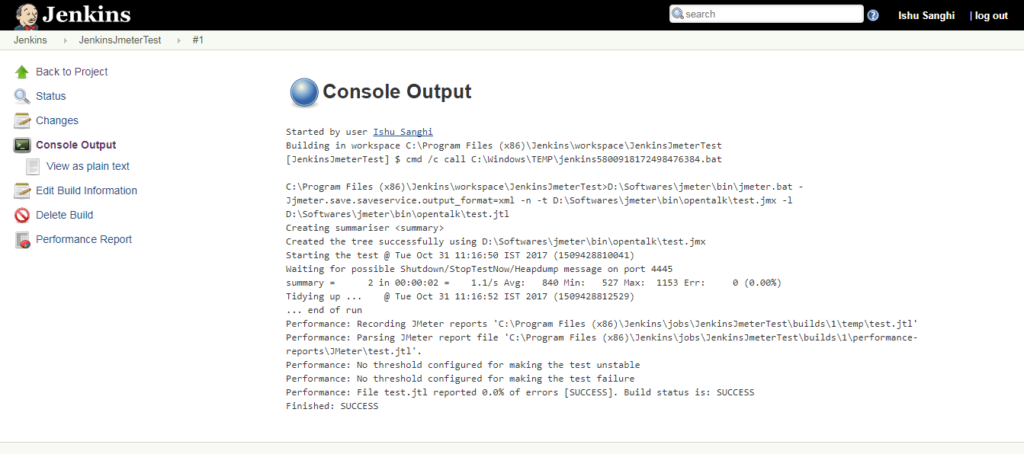
Step-8 After that click on Build Now.
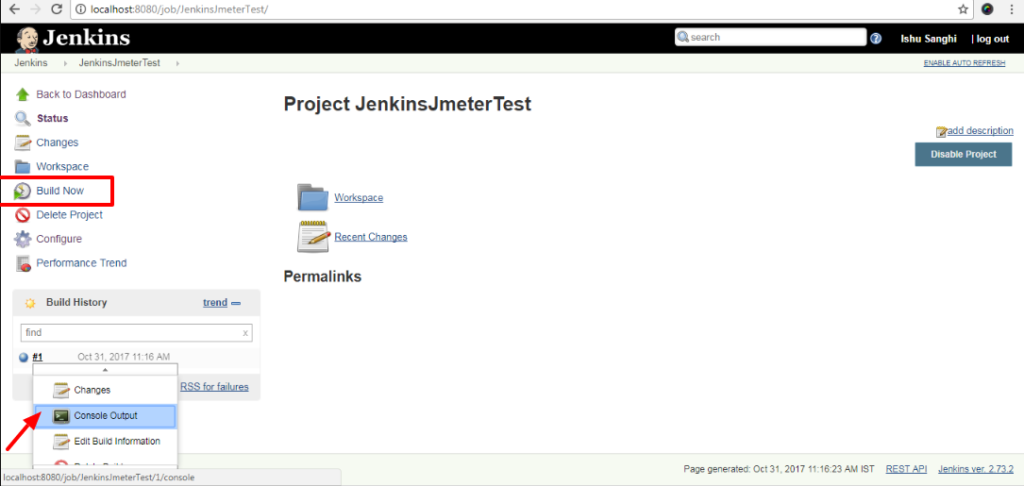
Step-9 Run the build and validate the test.