How to implement 2-way SSL using Spring Boot
- Digital Engineering
- General
- Performance and Security
How to implement 2-way SSL using Spring Boot
What is 2-way SSL(Mutual Authentication)?
In 2-way SSl both client and server have to present their certificates to each other to verify themselves with a trusted certificate.
In 2-way SSl there are 12 steps to digitally handshake. They send total 12 handshake messages to each other to set up a secure encrypted channel for further communication.
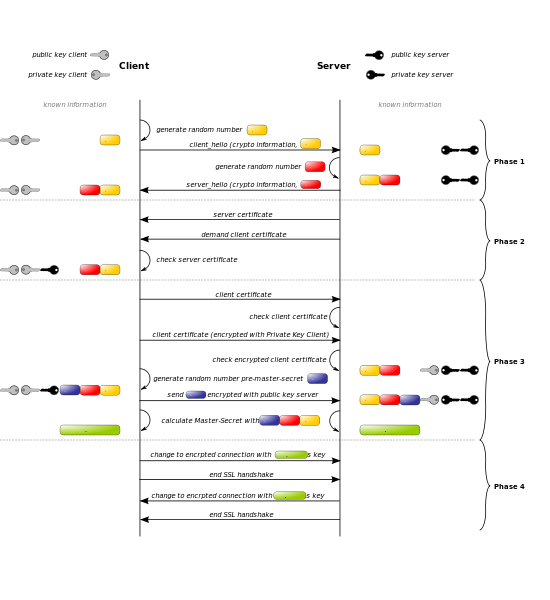
Fig. 2 way SSL handshake messages
Process of 2-way SSL communication:
-
Client sends ClientHello message proposing SSL options.
-
Server responds with ServerHello message selecting the SSL options.
-
Server sends Certificate message, which contains the server’s certificate.
-
Server requests client’s certificate in CertificateRequest message, so that the connection can be mutually authenticated.
-
Server concludes its part of the negotiation with ServerHelloDone message.
-
Client responds with Certificate message, which contains the client’s certificate.
-
Client sends session key information (encrypted with server’s public key) in ClientKeyExchange message.
-
Client sends a CertificateVerify message to let the server know it owns the sent certificate.
-
Client sends ChangeCipherSpec message to activate the negotiated options for all future messages it will send.
-
Client sends Finished message to let the server check the newly activated options.
-
Server sends ChangeCipherSpec message to activate the negotiated options for all future messages it will send.
-
Server sends Finished message to let the client check the newly activated options.
Pre-Requisites:
- Java 1.8
- Spring Boot 2.4.4
- Keytool (bundled with jdk)
To implement 2-way SSL we will create 2 applications in spring boot: client application and server application.
Create self signed certificate for client:
We have different ways to do this but in this blog we will use “keytool” to generate a certificate:
|
1 |
keytool -genkeypair -alias client-app -keyalg RSA -keysize 2048 -storetype JKS -keystore client-app.jks -validity 3650 -ext SAN=dns:localhost,ip:127.0.0.1 |
Here we created a jks(java key store) file or certificate for client.
Here SAN entry is very critical for self signed certificate as it may generate problem with chrome and safari browser if we skip it.
Create certificate for server application:
|
1 |
keytool -genkeypair -alias server-app -keyalg RSA -keysize 2048 -storetype JKS -keystore server-app.jks -validity 3650 -ext SAN=dns:localhost,ip:127.0.0.1 |
Create public certificate file from client app certi:
Now we will create public certi(.crt) from client jks file.
|
1 2 3 |
keytool -export -alias client-app -file client-app.crt -keystore client-app.jks Enter keystore password: |
Create public certificate file from server app certi:
create public certi from server jks file.
|
1 2 3 |
keytool -export -alias server-app -file server-app.crt -keystore server-app.jks Enter keystore password: |
We created public certificates and keystores for both client and server.
Now we will establish trust between them by importing client certificate into server’s keystore and vice versa.
Import server’s certificate into client keystore:
|
1 |
keytool -import -alias server-app -file server-app.crt -keystore client-app.jks |
Import client’s certificate to server keystore:
|
1 |
keytool -import -alias client-app -file client-app.crt -keystore server-app.jks |
Next step is to configure our applications for encrypted SSL communication.
Configure Server for 2 way SSL communication:
- We have to copy java key store file to our resources folder(src/main/resources) in our server application
- Add following code to our application’s properties file(application.properties or application.yml).
|
1 2 3 4 5 6 7 8 9 10 11 12 13 14 15 16 17 |
spring: application: name: server-app --- server: port: 9002 ssl: enabled: true client-auth: need key-store: classpath:server-app.jks key-store-password: server-app key-alias: server-app key-store-type: JKS key-store-provider: SUN trust-store: classpath:server-app.jks trust-store-password: server-app trust-store-type: JKS |
Create a controller class for incoming request:
|
1 2 3 4 5 6 7 8 9 |
@RestController @RequestMapping(value = "/server-app") public class ServerAppController { @RequestMapping(value = "/data", method = RequestMethod.GET) public String getData() { System.out.println("Returning data from server-app data method"); return "Hello from Server-App-data method"; } } |
That’s all from server side now we need to configure client.
Configure Client for 2 way SSL :
- We have to copy java key store file to our resources folder(src/main/resources) in our client application
- Add following code to our application’s properties file(application.properties or application.yml).
|
1 2 3 4 5 6 7 8 9 10 11 12 13 14 15 16 17 18 19 20 |
spring: application: name: client-app --- server: port: 9001 ssl: enabled: true client-auth: need key-store: classpath:client-app.jks key-store-password: client-app key-alias: client-app key-store-type: JKS key-store-provider: SUN trust-store: classpath:client-app.jks trust-store-password: client-app trust-store-type: JKS --- endpoint: server-app: https://localhost:9002/server-app/data |
|
1 2 3 4 5 6 7 8 |
<dependency> <groupId>org.apache.httpcomponents</groupId> <artifactId>httpcore</artifactId> </dependency> <dependency> <groupId>org.apache.httpcomponents</groupId> <artifactId>httpclient</artifactId> </dependency> |
|
1 2 3 4 5 6 7 8 9 10 11 12 13 14 15 16 17 18 19 20 21 22 23 24 25 26 27 28 29 30 31 32 33 34 |
@Bean public RestTemplate getRestTemplate() { RestTemplate restTemplate = new RestTemplate(); KeyStore keyStore; HttpComponentsClientHttpRequestFactory requestFactory = null; try { keyStore = KeyStore.getInstance("jks"); ClassPathResource classPathResource = new ClassPathResource("client-app.jks"); InputStream inputStream = classPathResource.getInputStream(); keyStore.load(inputStream, "client-app".toCharArray()); SSLConnectionSocketFactory socketFactory = new SSLConnectionSocketFactory(new SSLContextBuilder() .loadTrustMaterial(null, new TrustSelfSignedStrategy()) .loadKeyMaterial(keyStore, "client-app".toCharArray()).build(), NoopHostnameVerifier.INSTANCE); HttpClient httpClient = HttpClients.custom().setSSLSocketFactory(socketFactory) .setMaxConnTotal(Integer.valueOf(5)) .setMaxConnPerRoute(Integer.valueOf(5)) .build(); requestFactory = new HttpComponentsClientHttpRequestFactory(httpClient); requestFactory.setReadTimeout(Integer.valueOf(10000)); requestFactory.setConnectTimeout(Integer.valueOf(10000)); restTemplate.setRequestFactory(requestFactory); } catch (Exception exception) { System.out.println("Exception Occured while creating restTemplate "+exception); exception.printStackTrace(); } return restTemplate; } |
Configure controller in Client-app:
Now we will create 2 controllers in our client’s controller class:
|
1 2 3 4 5 6 7 8 9 10 11 12 13 14 15 16 17 18 19 20 21 22 23 24 25 26 27 28 |
@RestController @RequestMapping(value="/client-app") public class ClientAppController { @Autowired RestTemplate restTemplate; @Value("${endpoint.server-app}") private String msEndpoint; @RequestMapping(value = "/data", method = RequestMethod.GET) public String getData() { System.out.println("Returning data from client-app own data method"); return "Hello from client-app-data method"; } @RequestMapping(value = "/server-data", method = RequestMethod.GET) public String getMsData() { System.out.println("Got inside client-app-server-data method"); try { System.out.println("MS Endpoint name : [" + msEndpoint + "]"); return restTemplate.getForObject(new URI(msEndpoint), String.class); } catch (Exception ex) { ex.printStackTrace(); } return "Exception occurred.. so, returning default data"; } } |
Here we created 2 methods, one of them is communicating with the server controller using RestTemplate. We defined “msEndpoint” in our application.yml file.
Finally we configured both applications for 2 way SSL communication. Now we have to run these application as Spring Boot App in our IDE(I prefer STS).
Now our client and server applications will start on ports respectively 9001 and 9002 that we defined in application.yml file.
Configure IDE to see all handshake protocol in IDE’s console:
To see complete debugging and all 12 digital handshake messages in our IDE’s console we have to follow these steps :
- Right click on server-app and select run as from list.
- Open “Run Configurations” and click on tab “arguments”.
- Add following arguments to “VM arguments” tab
|
1 2 3 |
-Dhttps.protocols=TLSv1.2,TLSv1.1,TLSv1 -Djavax.net.debug=ssl:handshake:verbose:keymanager:trustmanager -Djava.security.debug=access:stack |
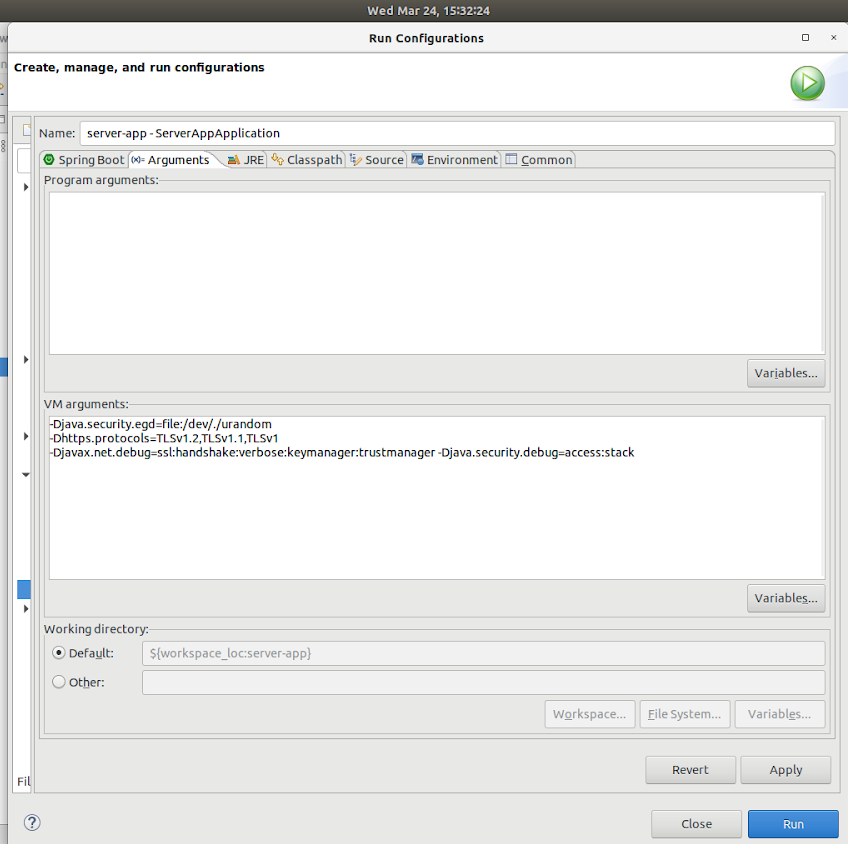
That’s all and you can see complete debugging.
Import Certificate to Browser:
Now the problem is that we can’t browse these application’s url on the browser as our browser will complain about the certificate because here we configured the app for 2 way SSL so we need to import our server’s certificate to our browser.
Unfortunately our browser can’t understand .jks file it understands only PKCS12 format file so we have to convert our jks file to PKCS12 format. To do this we can use “keytool”:
|
1 |
keytool -importkeystore -srckeystore server-app.jks -destkeystore server-app.p12 -srcstoretype JKS -deststoretype PKCS12 -srcstorepass server-app -deststorepass server-app -srcalias server-app -destalias server-app -srckeypass server-app -destkeypass server-app -noprompt |
Here we converted the .jks file to .p12 format.
Now we will import this .p12 file on our browser so that our browser can present this cert to our client application for authentication purposes.
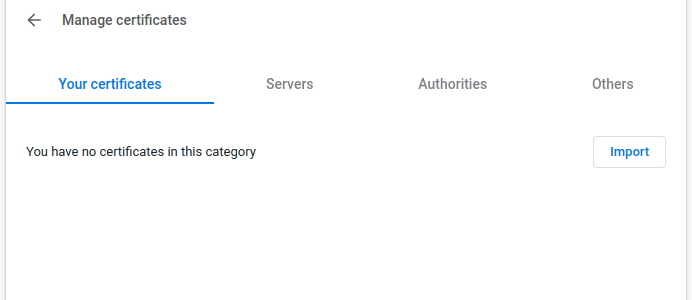
Steps to import .p12 file on chrome browser are:
- Open settings tab of chrome browser and open security tab.
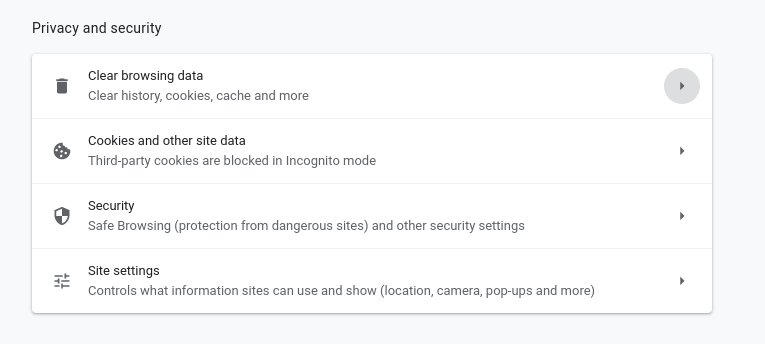
- In the security tab go to bottom of the page and open “Manage Certificates” tab.
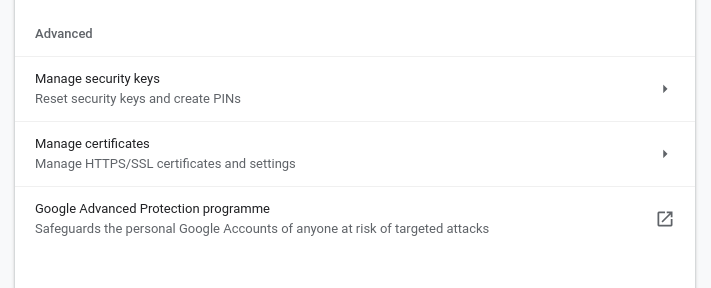
- Now tap on “import” and select .p12 file and import it to browser.
That’s it now we are ready to test our application on browser using https://localhost:9001/{urlEndpoint} .
Now when we hit the url of our application the browser will give warning that “Your connection is not private”.
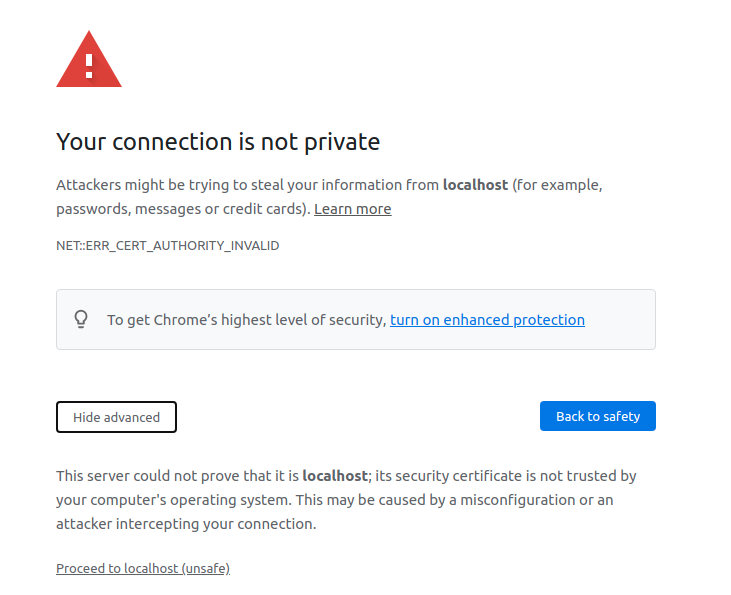
Just click on “advanced” and then tap on “proceed to localhost(unsafe).
Then select the certificate that you imported in the browser from the alert box and you are all set.
You can find complete source code on Bitbucket : https://bitbucket.org/nikhil_khicher/2-way-ssl-set-up/src/master/
Thank you