What is TestProject.io? Learn How To Record & Run Script
- Quality Engineering
What is TestProject.io? Learn How To Record & Run Script
What is Testproject?
TestProject is an automation tool that automates Web and Mobile applications. It is an open-source friendly, community-powered automation tool. It makes it easier for testers and developers to do their jobs quickly, and to collaborate using popular open-source frameworks (e.g., Selenium and Appium) to ensure quality with speed.It enables the QA Engineers to test Web applications along with Android and iOS effortlessly. It allows the sharing of TestProject addons created by like-minded automation experts or your team from anywhere across the globe.
Creating an Account:-
To use TestProject, users will need to have an account. In order to get started, go to the test project main page and click on the Free Sign Up button. After signing in, the user will need to install and set up an agent so that the user can start the features of TestProject.
Download TestProject Agent
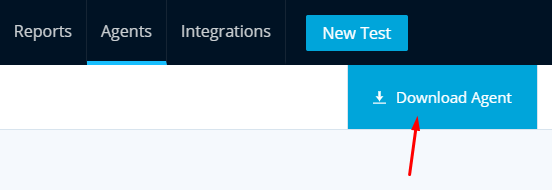
Firstly, log in to the TestProject. After logging in, go to the Agents tab at the top of the page and Download Agent. Once that download has finished you can use it to install the TestProject agent on your machine. After installation, users can start it up by finding the installed TestProject Agent executable on your machine and running that.
Starting the TestProject Agent
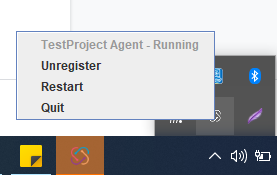
Search for TestProject in the Windows search bar and click on the Agent to start it. The agent will then start up on your computer and the user will be able to see the status of it by right-clicking on the icon in the system tray.
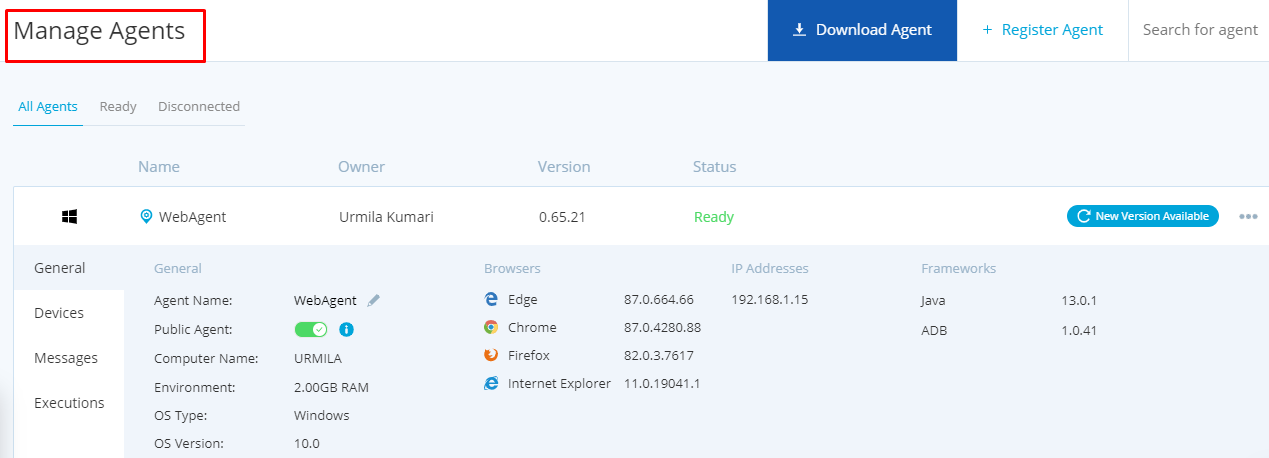
Manage TestProject Agents
TestProject agents allow you to create and run tests on a local machine.
Creating an Android test using the Recorder
Users will need to make sure that mobile is in developer mode. Once you have done that you can find an option in the settings called developer options. Then the user will need to choose that option and in there choose to enable the USB debugging option. Your device should now be ready to use with TestProject.
Using a USB cable, you can plug it into any device with a TestProject agent in order to start using it. The user will get a popup asking you to authorize the device for use with TestProject. Select yes on this and you can start creating your first Android test.
Creating a Test
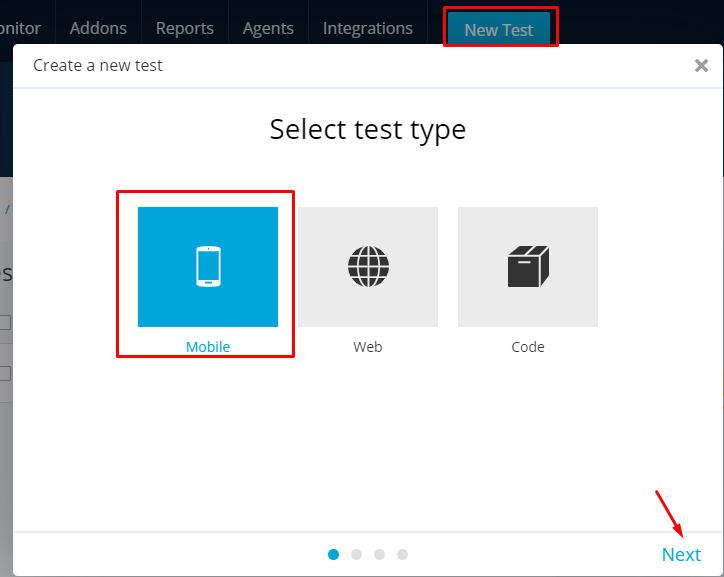
Click on the New Test button and then choosing the Mobile option and click on the NEXT button.

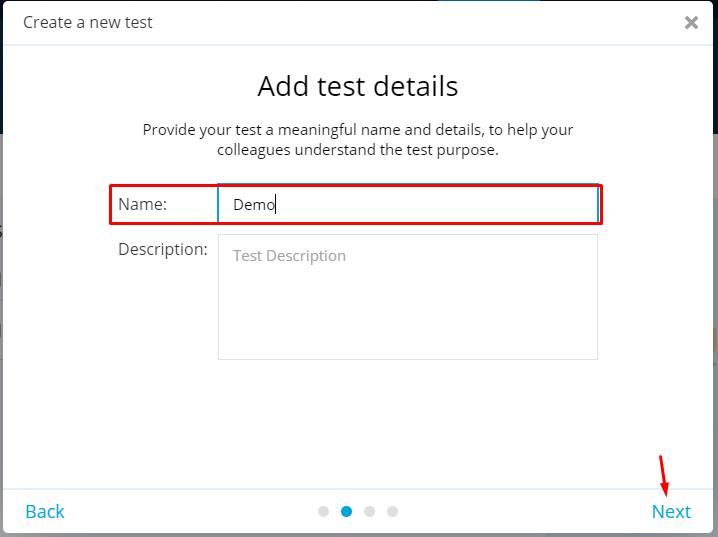
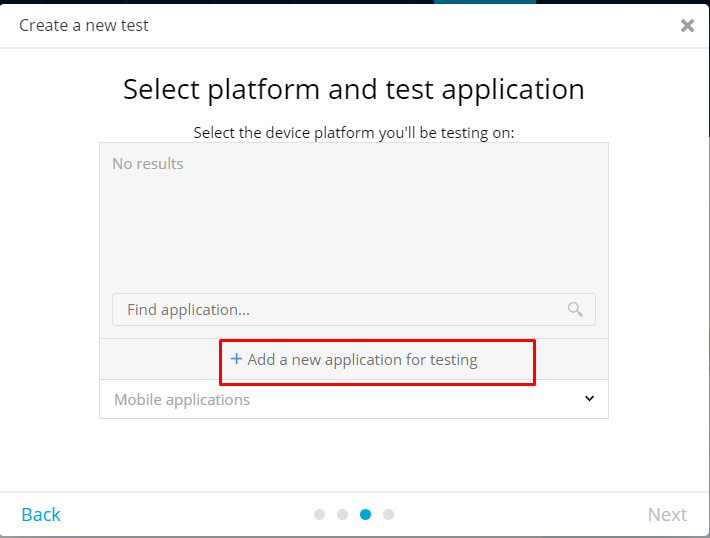
Once you have done that you can fill in a name and description for your test and press Next. You will then need to select which platform and application you want to use. For recording on an Android device, you would choose the Android platform and then you can select the app that you want to test. If this is the first test you are creating there will not be any applications in the list and so you will need to click on the Add a new application for the testing button.


You can add an application in a few different ways. A very simple way to do this is to make sure your device is connected and the agent is running and then selecting an application from the device. If you need to you can also manually add an application or just upload an APK. To select an application from your device, select it from the dropdown.

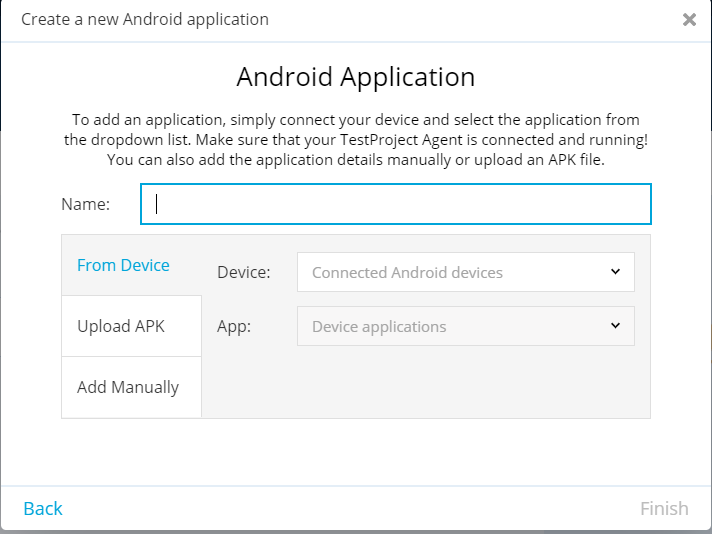
Once you have picked the application you want to use and give it a name you can click on Finish to select that application for the test you are creating.
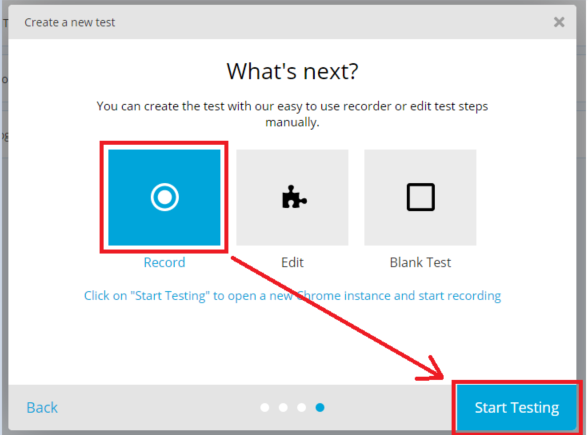
Recording a Test
Now you have created a test and specified the application to use for testing, you are ready to start creating the steps that you want your test to execute. You can create the steps manually if you want, or you can use the powerful recorder that TestProject offers. It will open the test recorder. The test recorder will show the test steps and will also connect to your device and include a mirrored view of it with the application under test loaded up and ready for you to start testing.

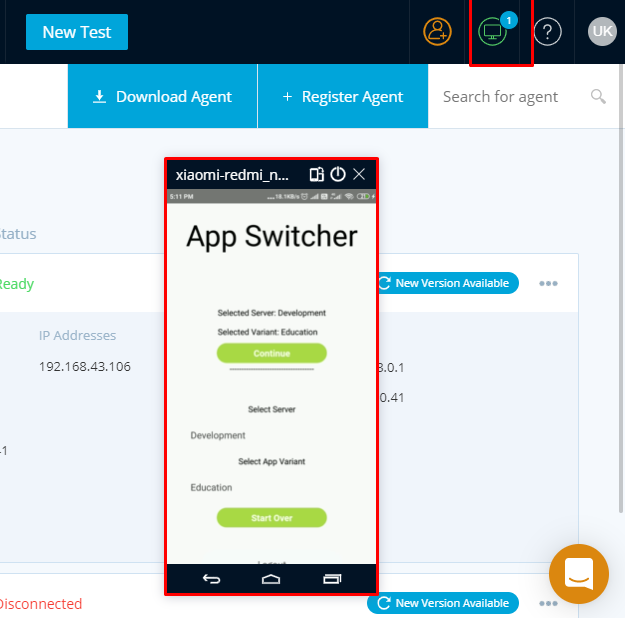
Mobile Screen Mirroring:
In-browser mobile device screen mirroring that provides full control over mobile devices. Need to connect the device via a USB cable to your machine.

Create and Schedule Jobs
TestProject provides the tools that need to schedule and run tests by adding a job to project.To create a job, navigate to the project you want to add a job for and in the right hand panel click on the Add a job button.
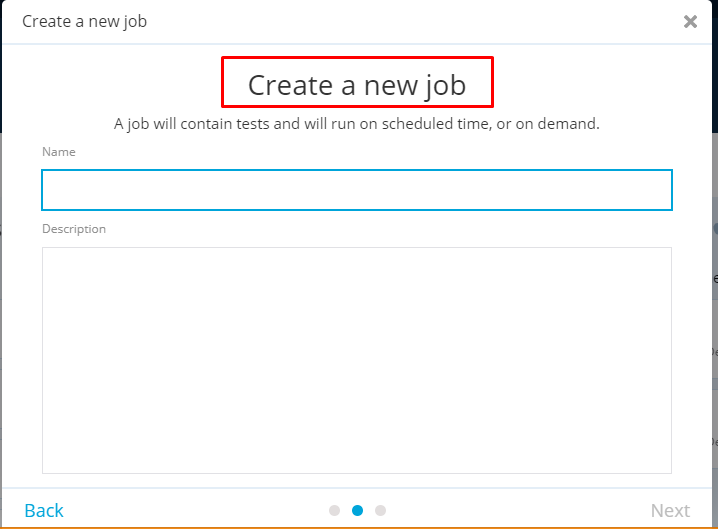
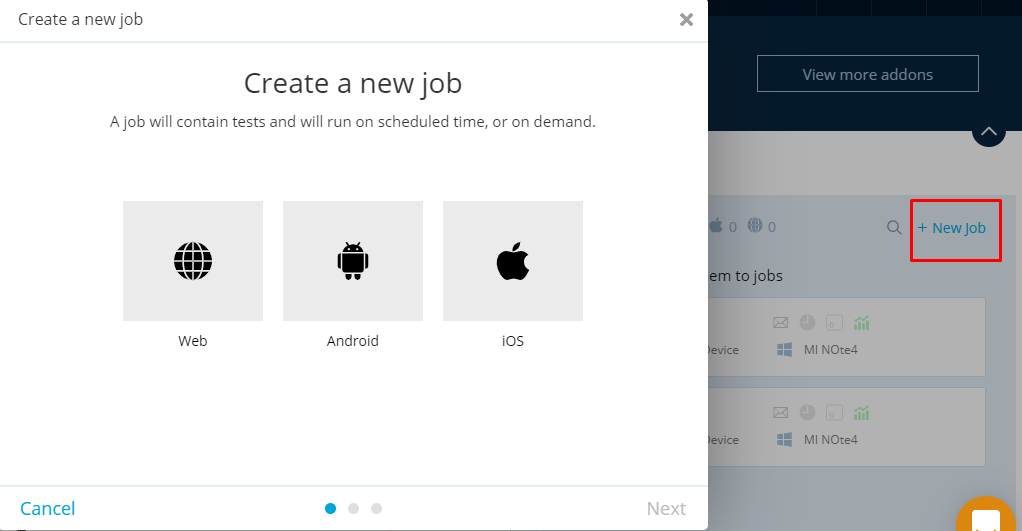 This will bring up the job creation wizard. Enter in a name and description for the job and click next. On the next page choose where you want the job to run. You can either run a mobile or web test and you can pick which agent you want to use to run the job. If you want to run the job as a mobile android test, be sure to pick an agent that will have an android device attached.
 After selecting the job type and clicking Next you will be prompted to pick the device you want to use (for mobile tests) or the browser you want the job to run on (for web tests).
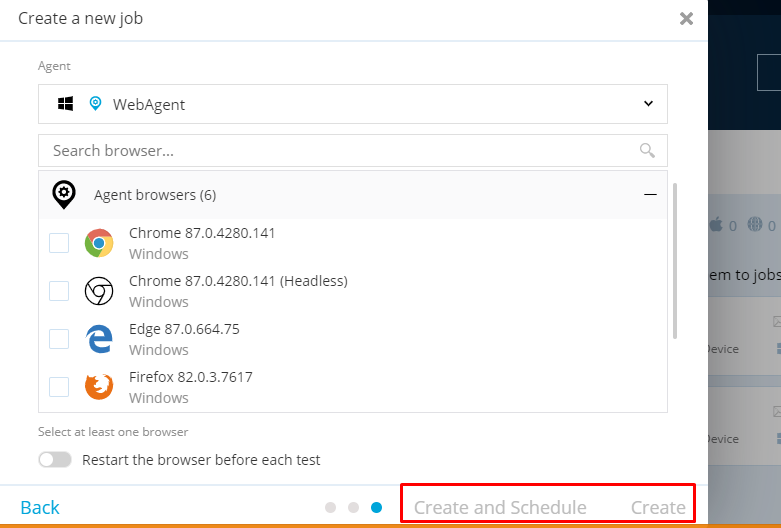
Pick the schedule that you want the job to run on. On Demand option will create a job with the settings that you’ve picked. You can then run this job any time you want by pressing the Run Job button.
You can also set up a job to run just one time. Pick the date and time and TestProject will schedule the job to run then. This option can be helpful for running a test that needs to execute a certain time – perhaps a test that you want to run at night while you are away from your machine.
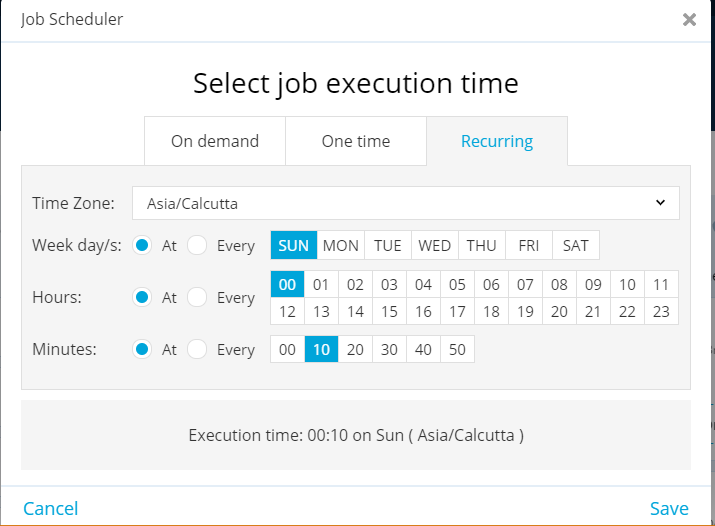
The final scheduling option is to set the job up to run at a regular recurring time. You can pick the frequency you want for the job and pick the particular time you want for it to run. For example, you may want to run a set of tests every evening or you may want to run an hourly suite of tests or a weekly suite. Any of these options can be set up. As you choose options on the picker, pay attention to the text at the bottom that lets you know what the execution time of the job will be so that you can be sure you are setting up the schedule in the way you want.