Jenkins Master and Slave Nodes
- General
Jenkins Master and Slave Nodes
In Jenkins, We can build all our applications on a single server. As the requirement grows and changes, we will come cross many issues like what if there are thousands build which needs to be done, what if different builds need to be done on different flavor of OS. In such cases the master-slave architecture comes in picture which takes care of all such odd requirements.
For example there might be an application which needs to be build on Ubuntu. There is another application that needs to be build on CentOS. As a solution we can have two slave nodes(one with Ubuntu installed and another with CentOS installed) and build the respective applications on these servers.
Jenkins Master and Slave Architecture
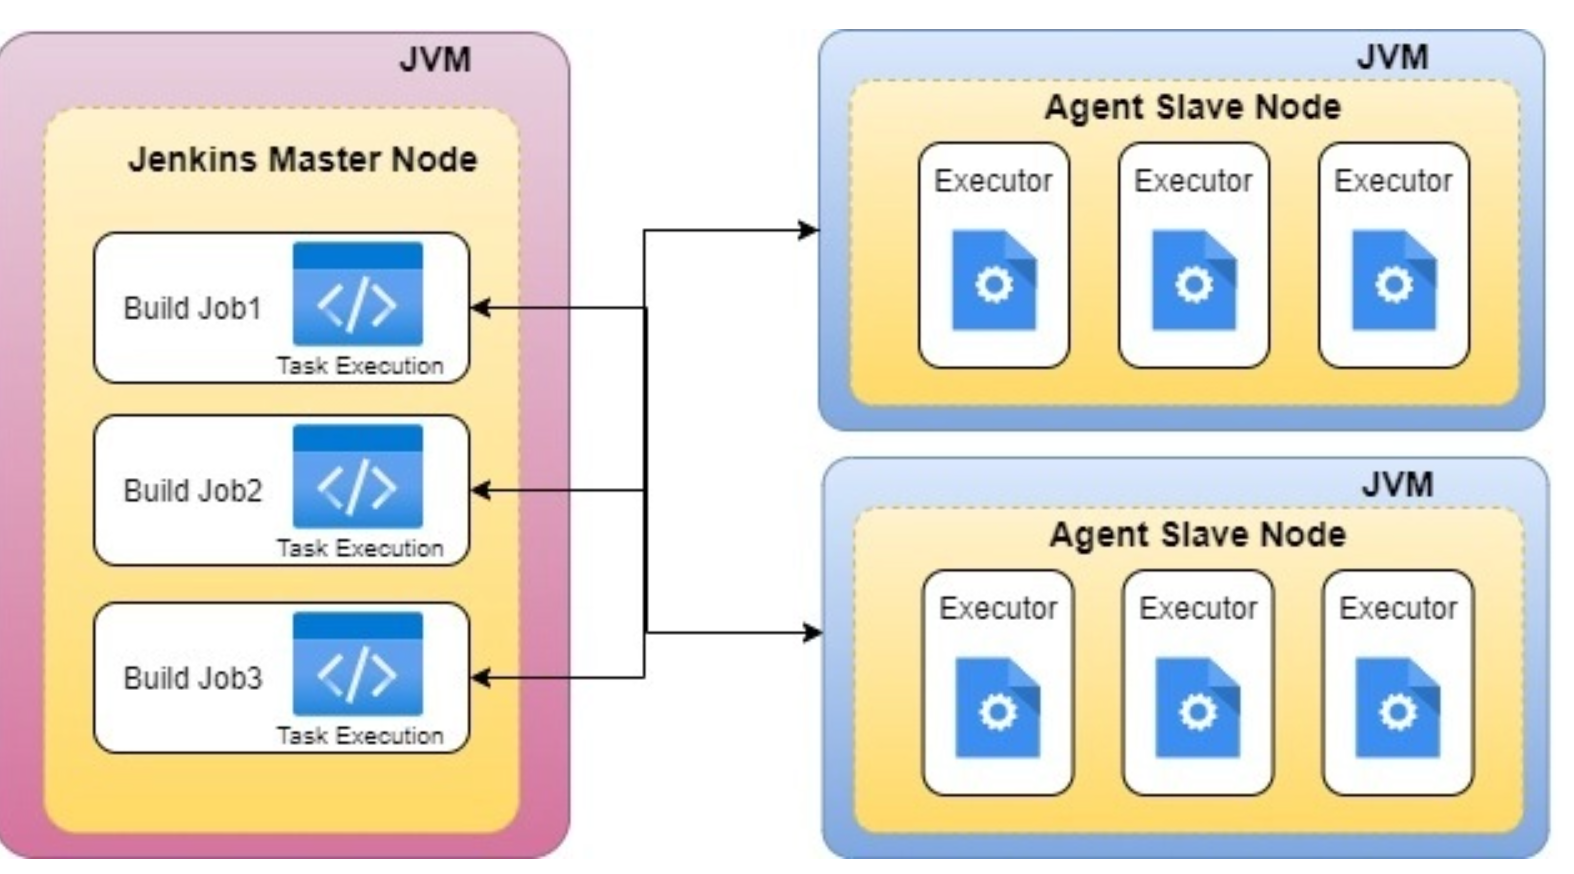
Jenkins Master
The Jenkins master acts to schedule the jobs, assign slaves, and send builds to slaves to execute the jobs. It will also monitor the slave state (offline or online) and get back the build result responses from slaves and the display build results on the console output.
Jenkins Slave
Slave is a java executable which receives the build instructions from the central master node. Let’s do the Master-Slave Configuration on GCP by following below steps and instructions.
How Jenkins Master and Slave Architecture works?
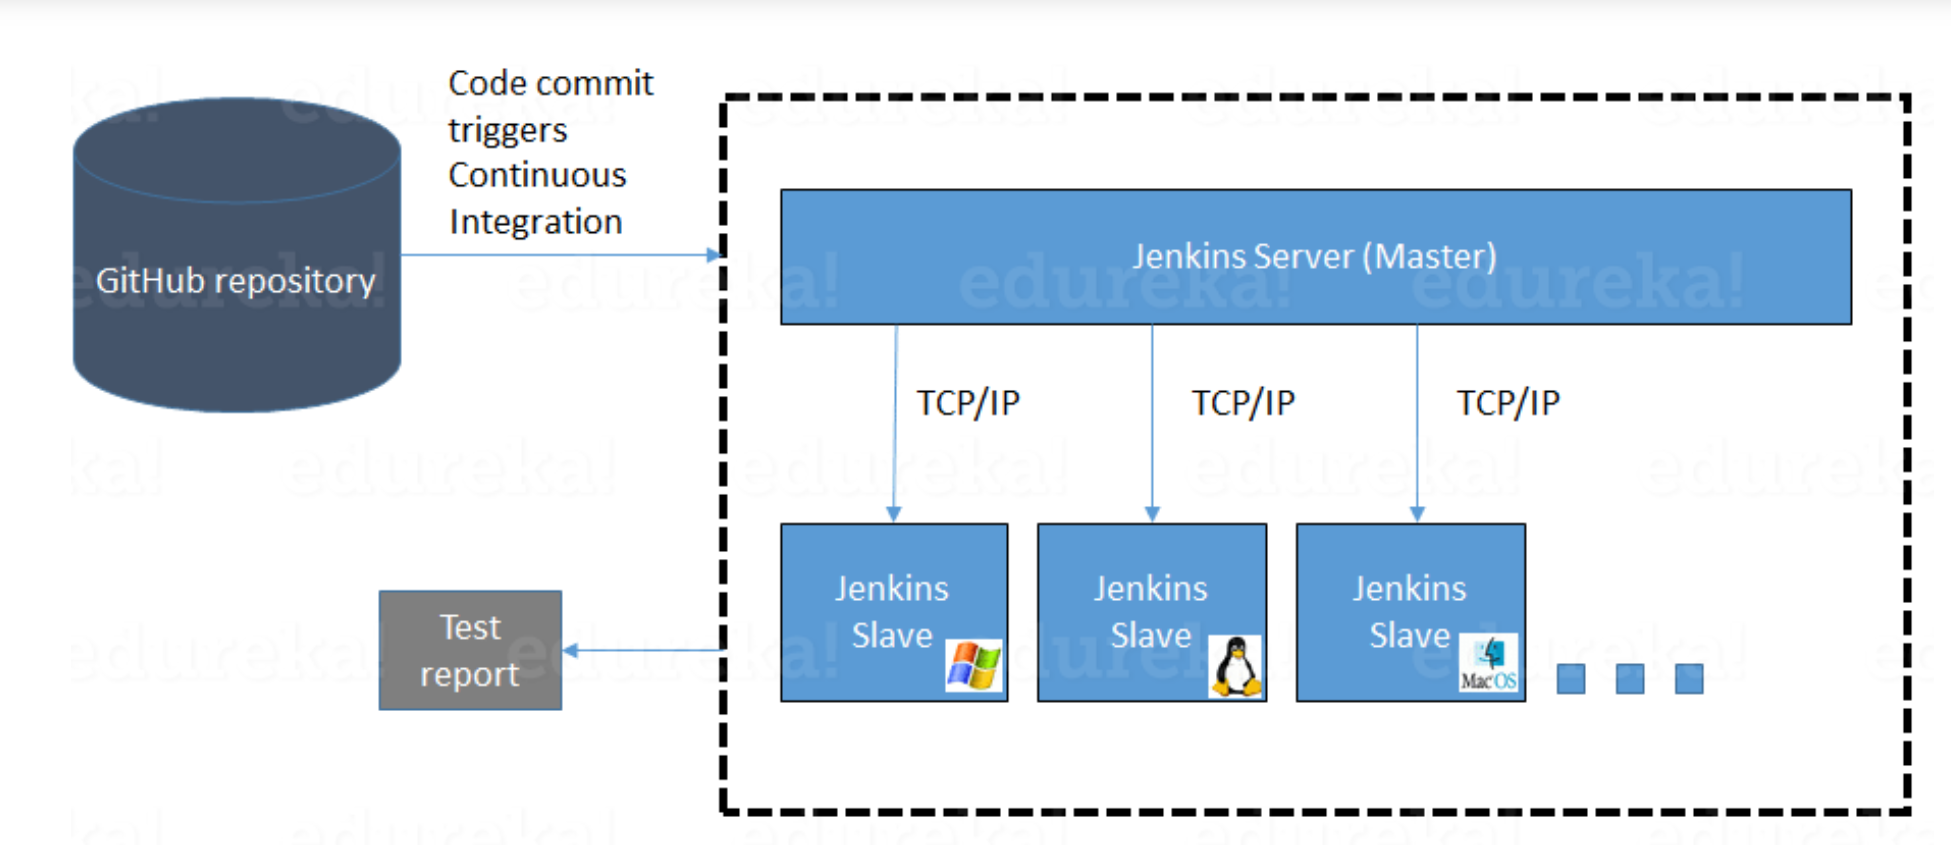
- Jenkins checks the Git repository at periodic intervals for any changes made in the source code.
- Each builds requires a different testing environment which is not possible for a single Jenkins server. In order to perform testing in different environments, Jenkins uses various Slaves as shown in the diagram.
- Jenkins Master requests these Slaves to perform testing and to generate test reports.
Master and Slave Setup
Windows Machine as Slave
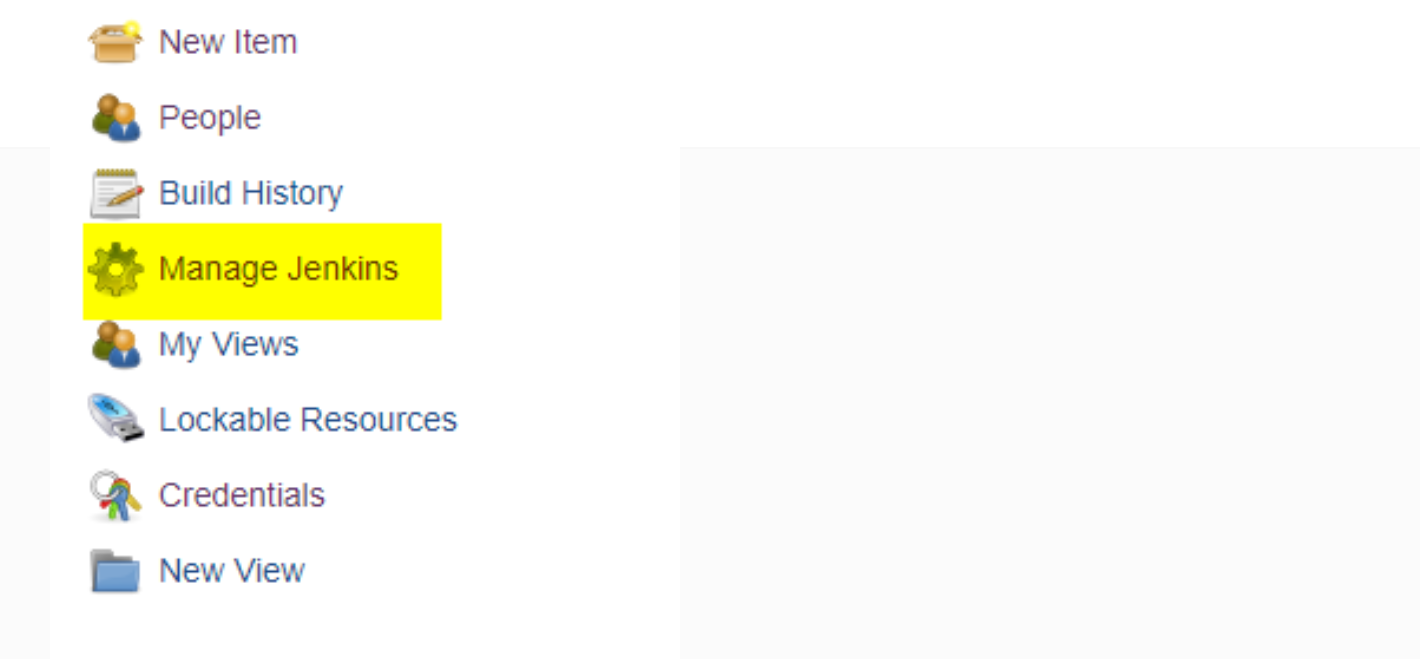
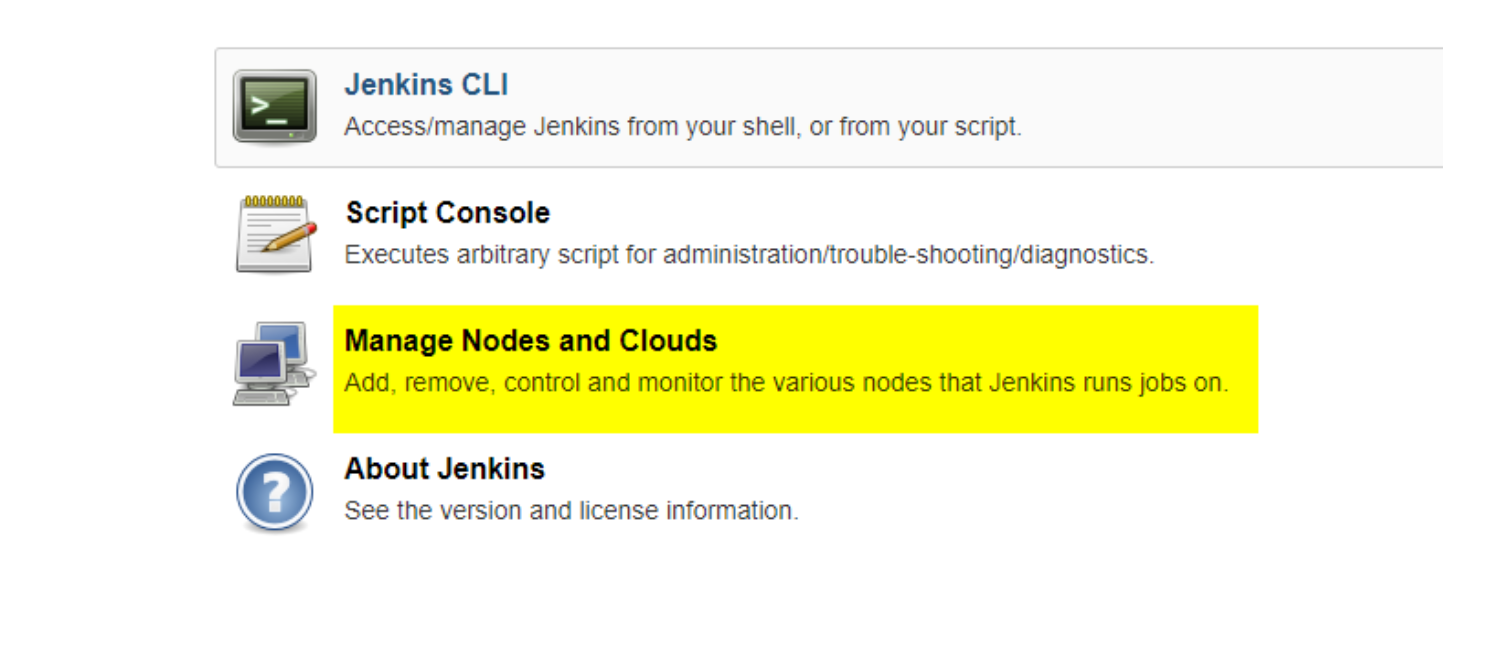
1. Go to the Manage Jenkins section and scroll down to the section of Manage Nodes.
2. Click on Manage Nodes and Clouds then click on New Node
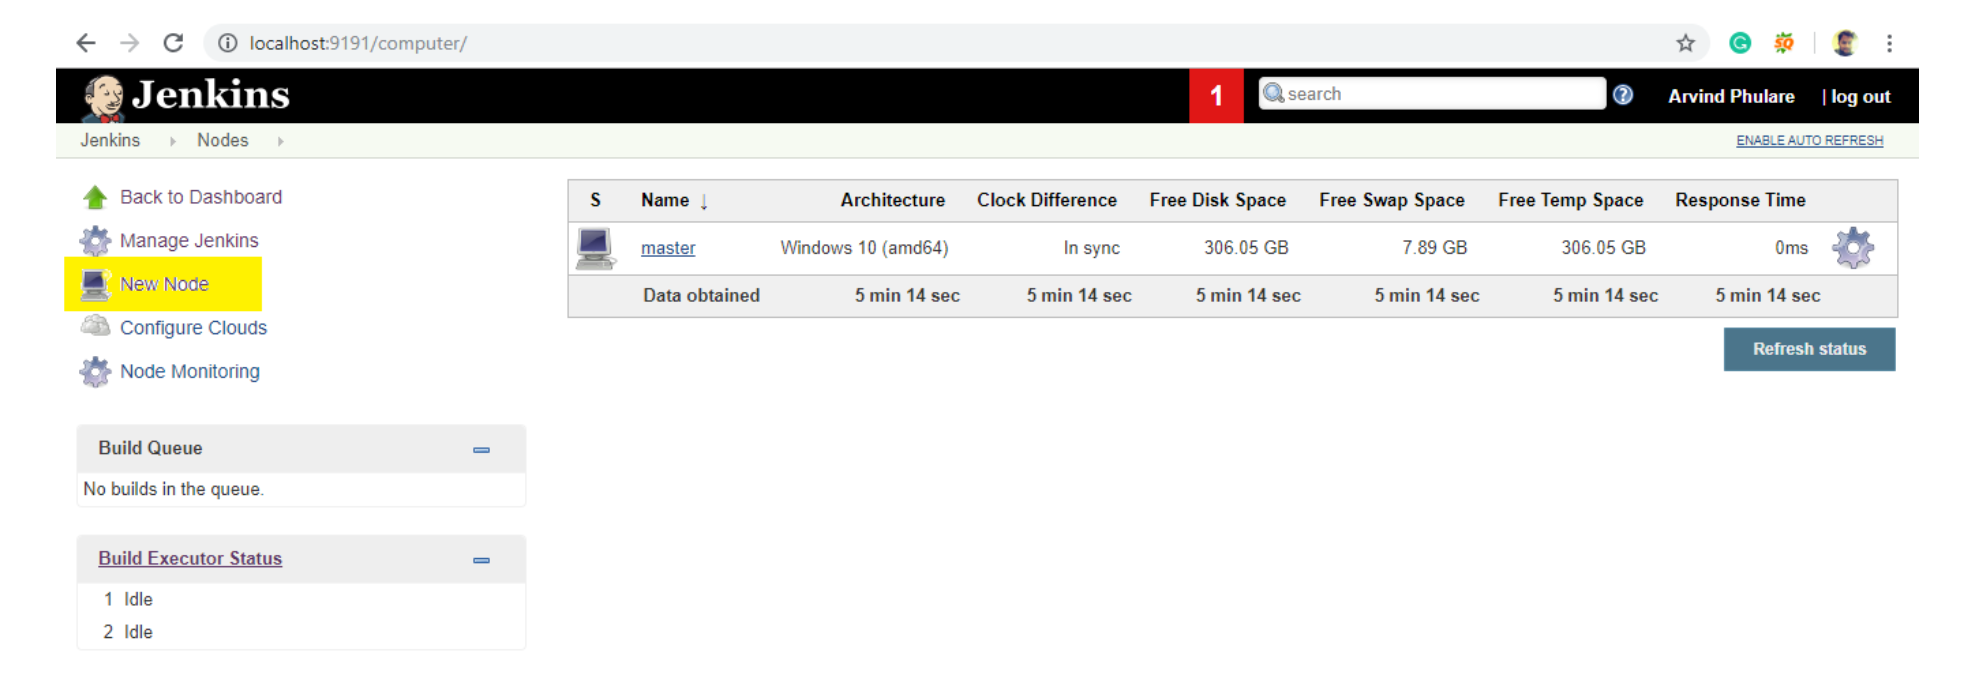
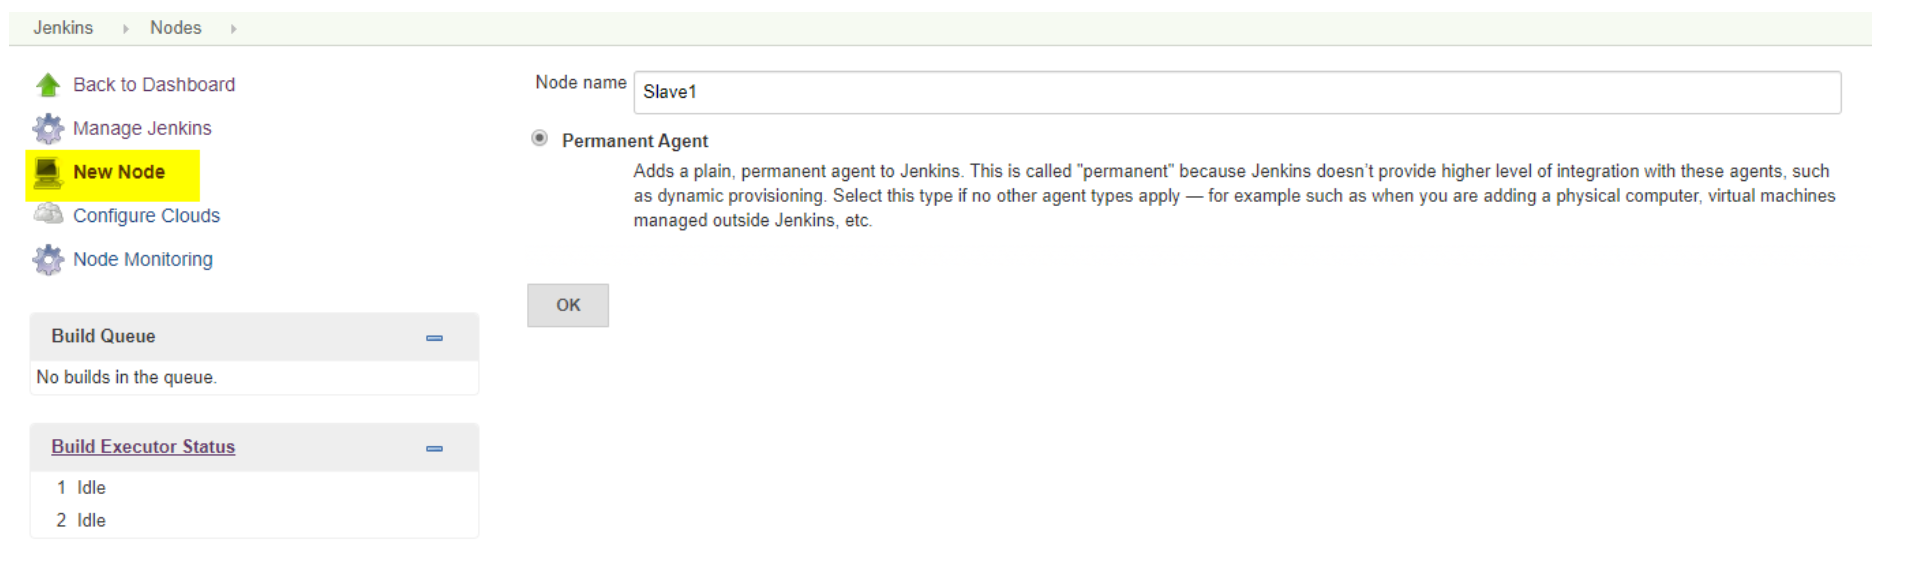
3. Give a name for the node, choose the Permanent Agent option and click on ok.
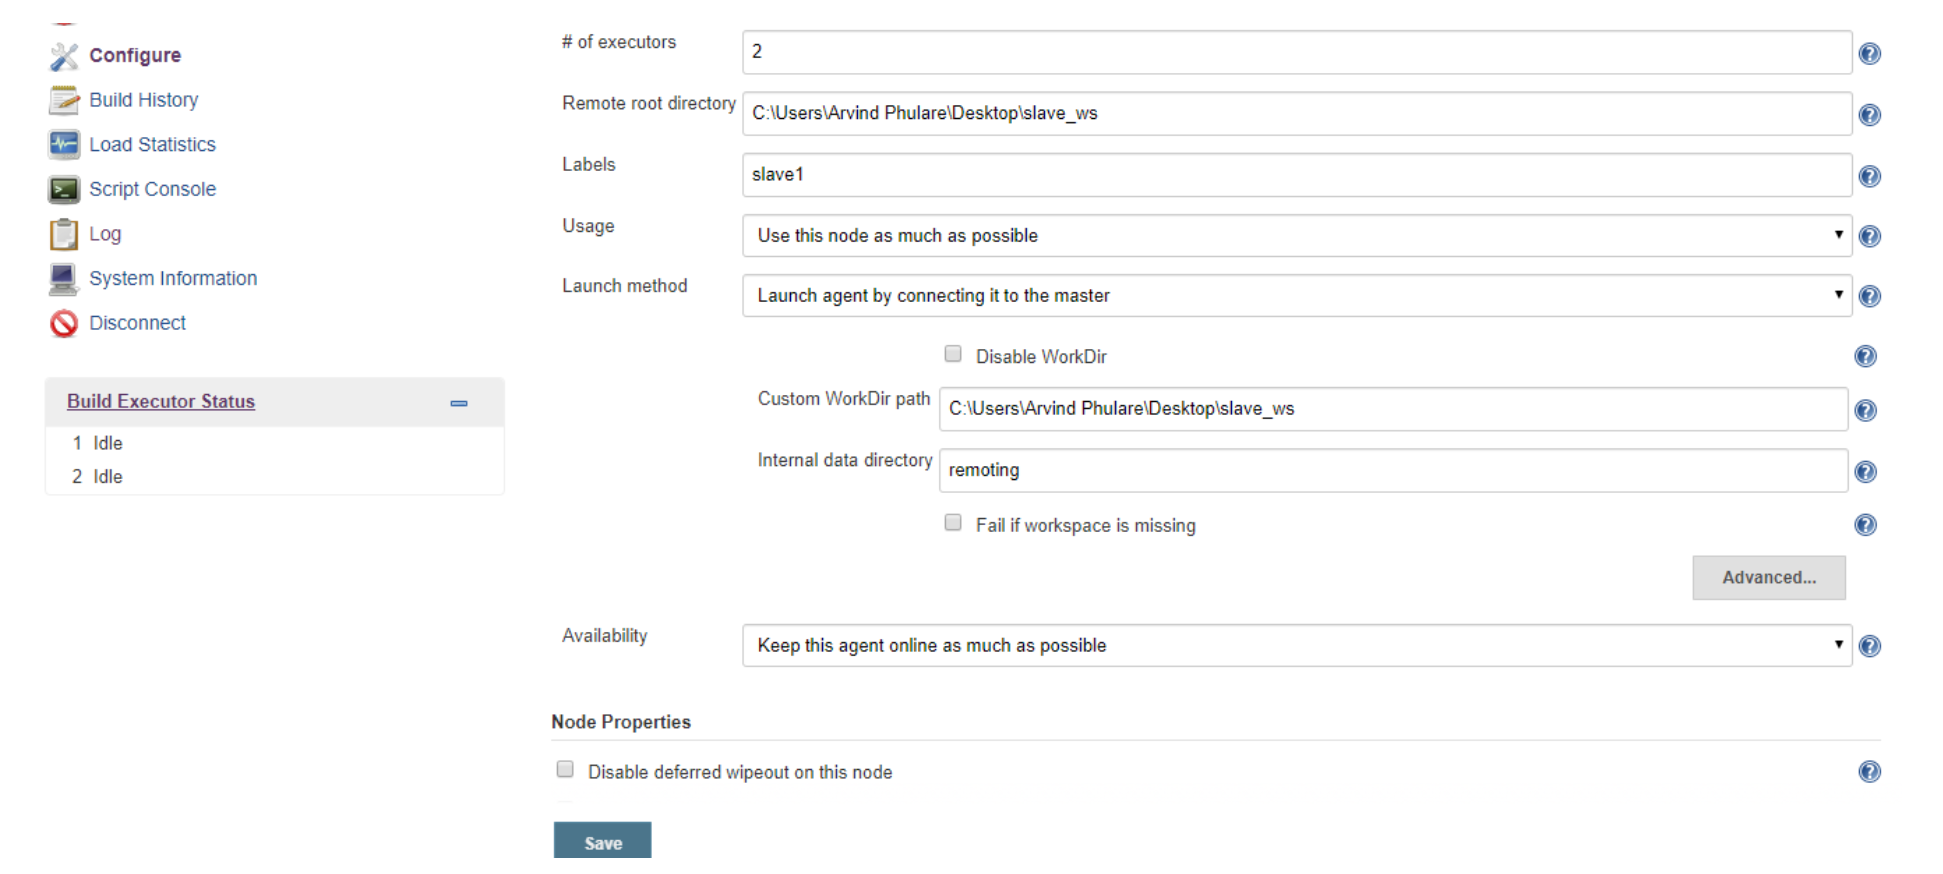
4. Enter the details of the node slave machine. Here
- No. of executers in nothing but no. of jobs that this slave can run parallelly. Labels for which the name is entered as “Slave1” is what can be used to configure jobs to use this slave machine.
- Usage to Use this node as much as possible.
- launch method we select the option of “Launch agent by connecting it to the master”.
- Custom WorkDir path as the workspace of your slave node.
- Availability select “Keep this agent online as much as possible”.
- Click on Save.
Once you complete the above steps, the new node machine will initially be in an offline state but will come online if all the settings in the previous screen were entered correctly. One can at any time make the node slave machine offline if required.
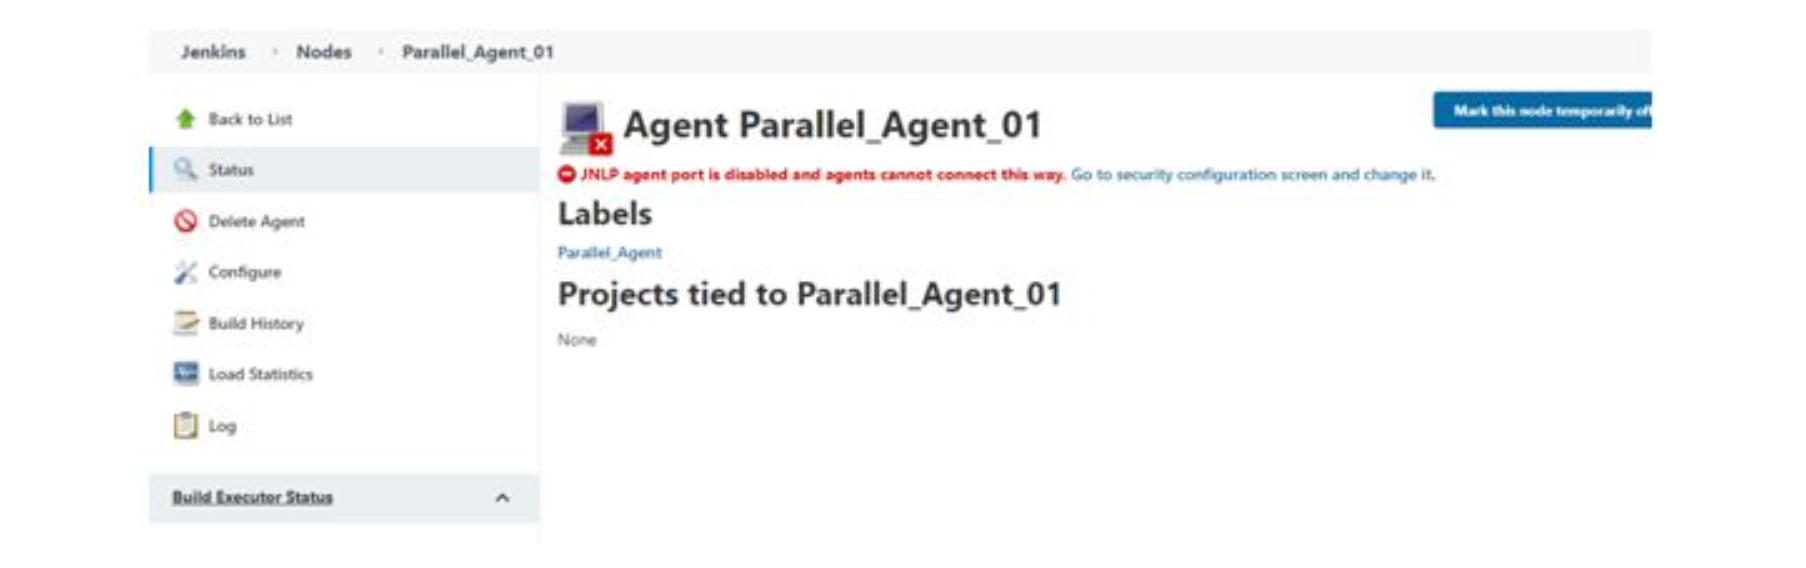
Click on Go to security configuration screen and change it. It will redirect to Configure Global Security -> Agents -> click on Fixed radio button port: 49187 and click on save Button. Go back to Nodes settings
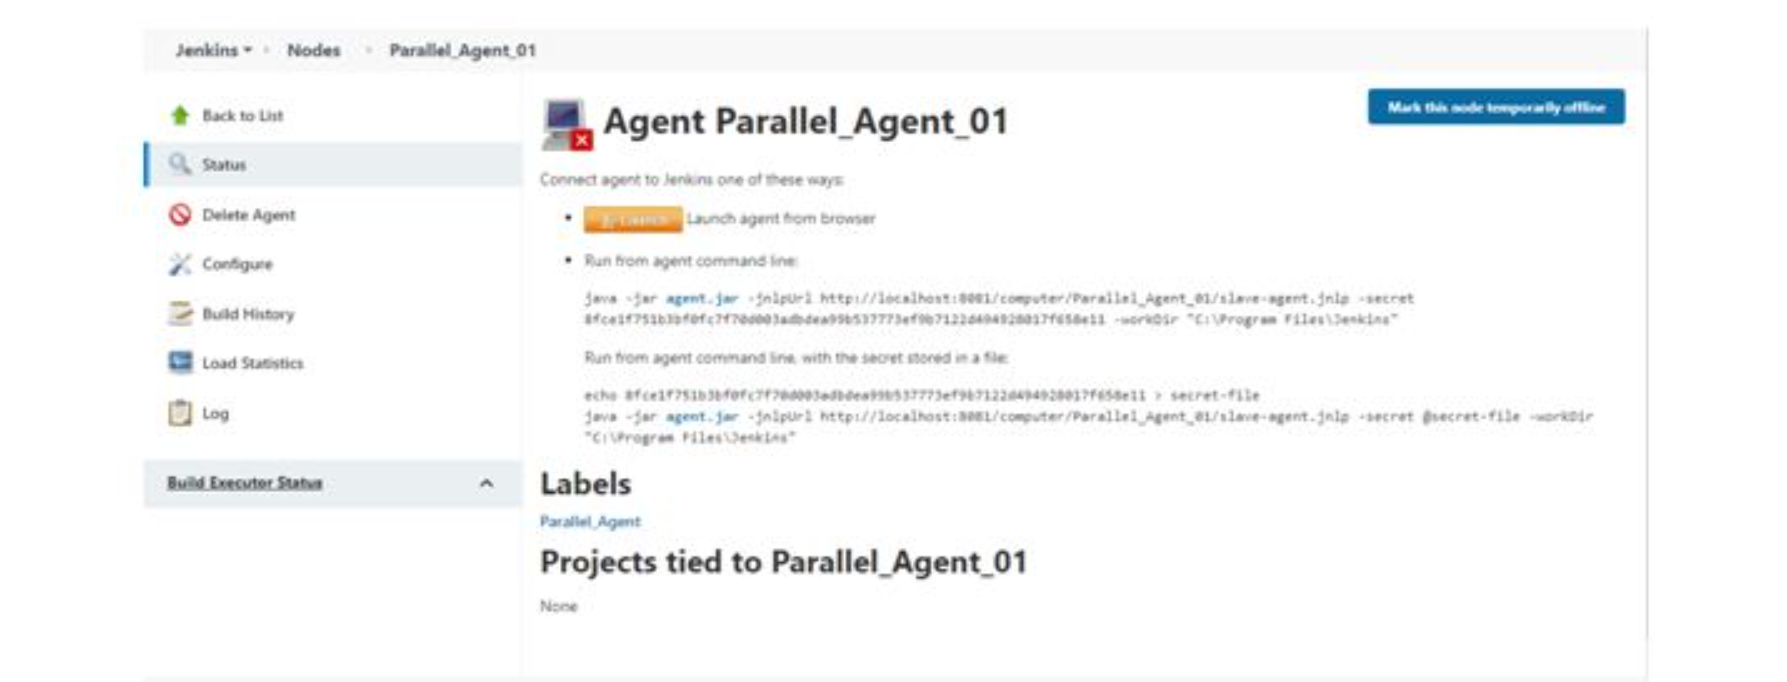
- We can see the above screen
Steps to Launch Agent and Connect
1. Click on Launch button, it will download the launch agent in your system.
2. Jenkins- slave.exe file should copy in the Jenkins folder which you installed in your system.
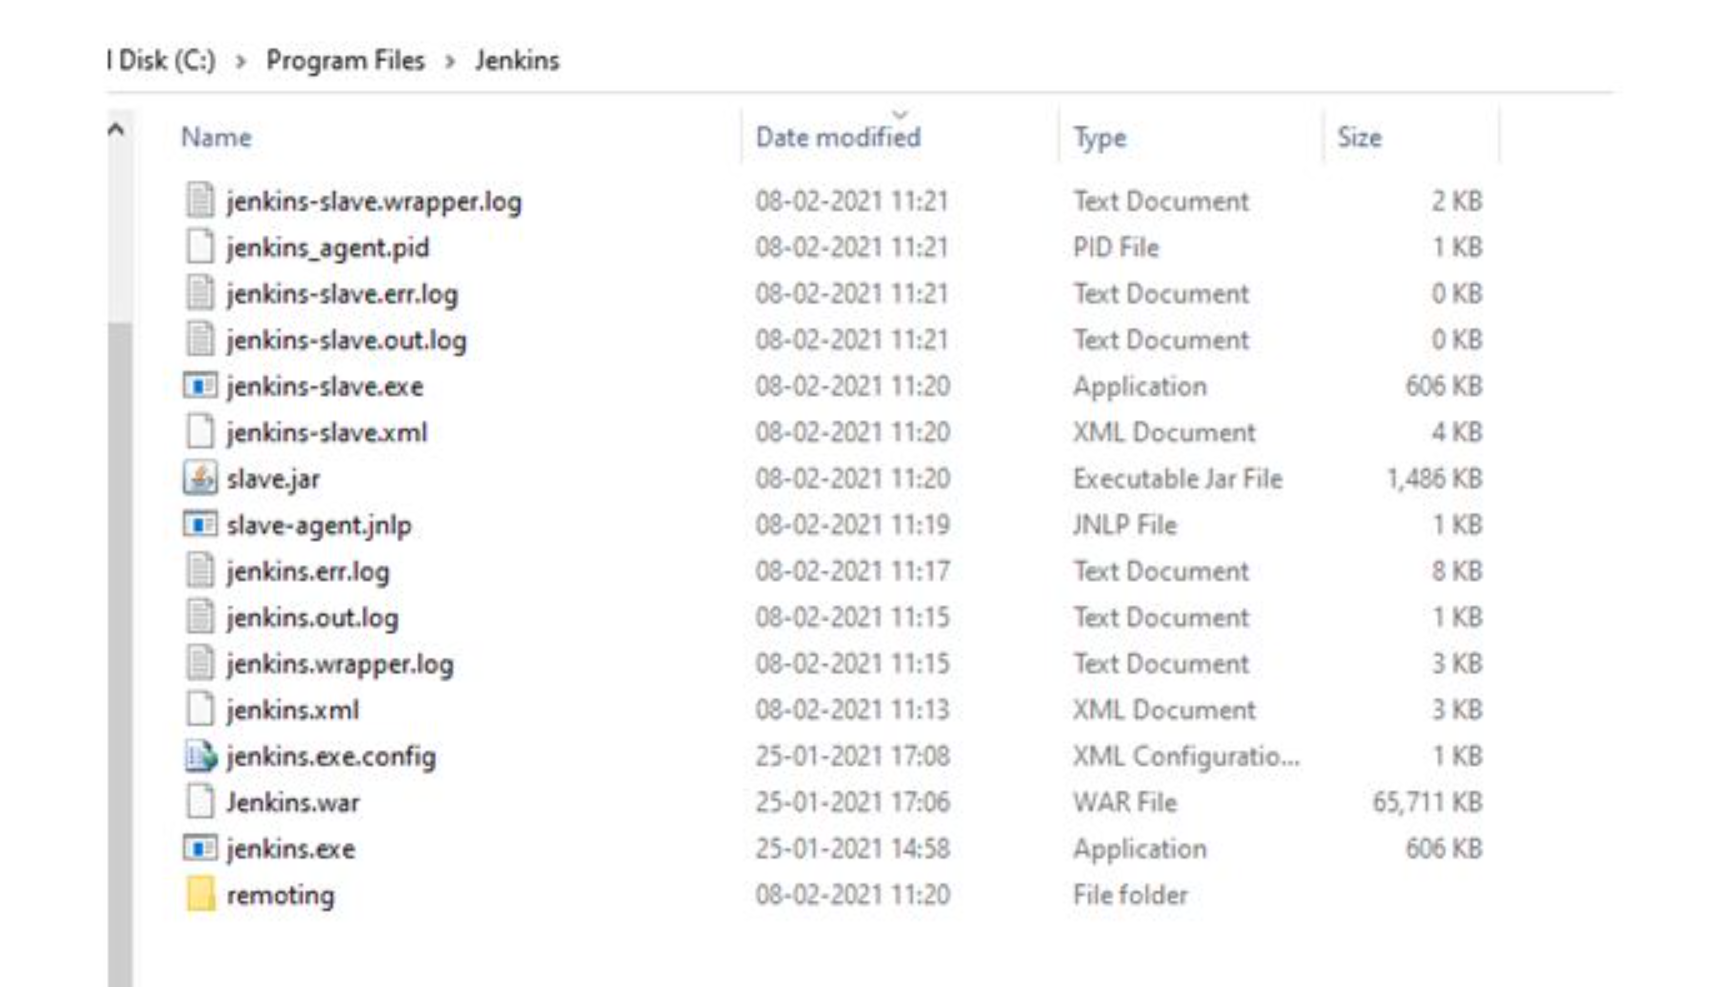
3. Double Click on jenkins – slave.exe.
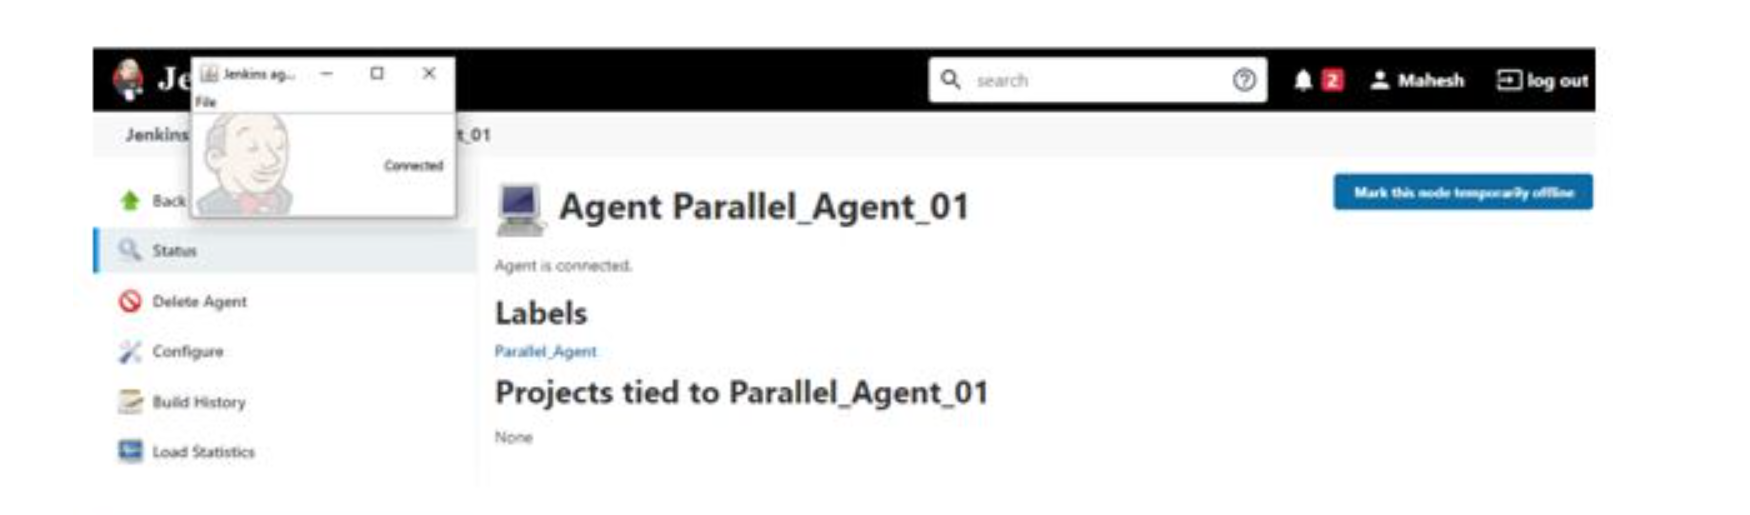
4. Run the launch agent, click on run button and it will show connected.
5. In below screen shot, we can see the connected popup, click on file menu, select the install as service and click yes button . Once it is done, refresh the page.
Linux as Slave
Configure Jenkins Master Credentials
When you got the master server Jenkins installed, we need to configure the master server itself. By default, there are different ways to start Jenkins agent nodes, we can launch the agent nodes through SSH, windows administrative account, and via Java Web Start (JNLP), pick the best way depending on your environment setup and operating system.
For this guide, we will launch the agent nodes through ssh, and we need to setup Jenkins credentials on our master server.
Generate SSH Key
We will be using the ssh key authentication to setup our agent nodes, so we need to generate the ssh key for the Jenkins user and then upload the key to each server node manually using ‘ssh-copy-id’.
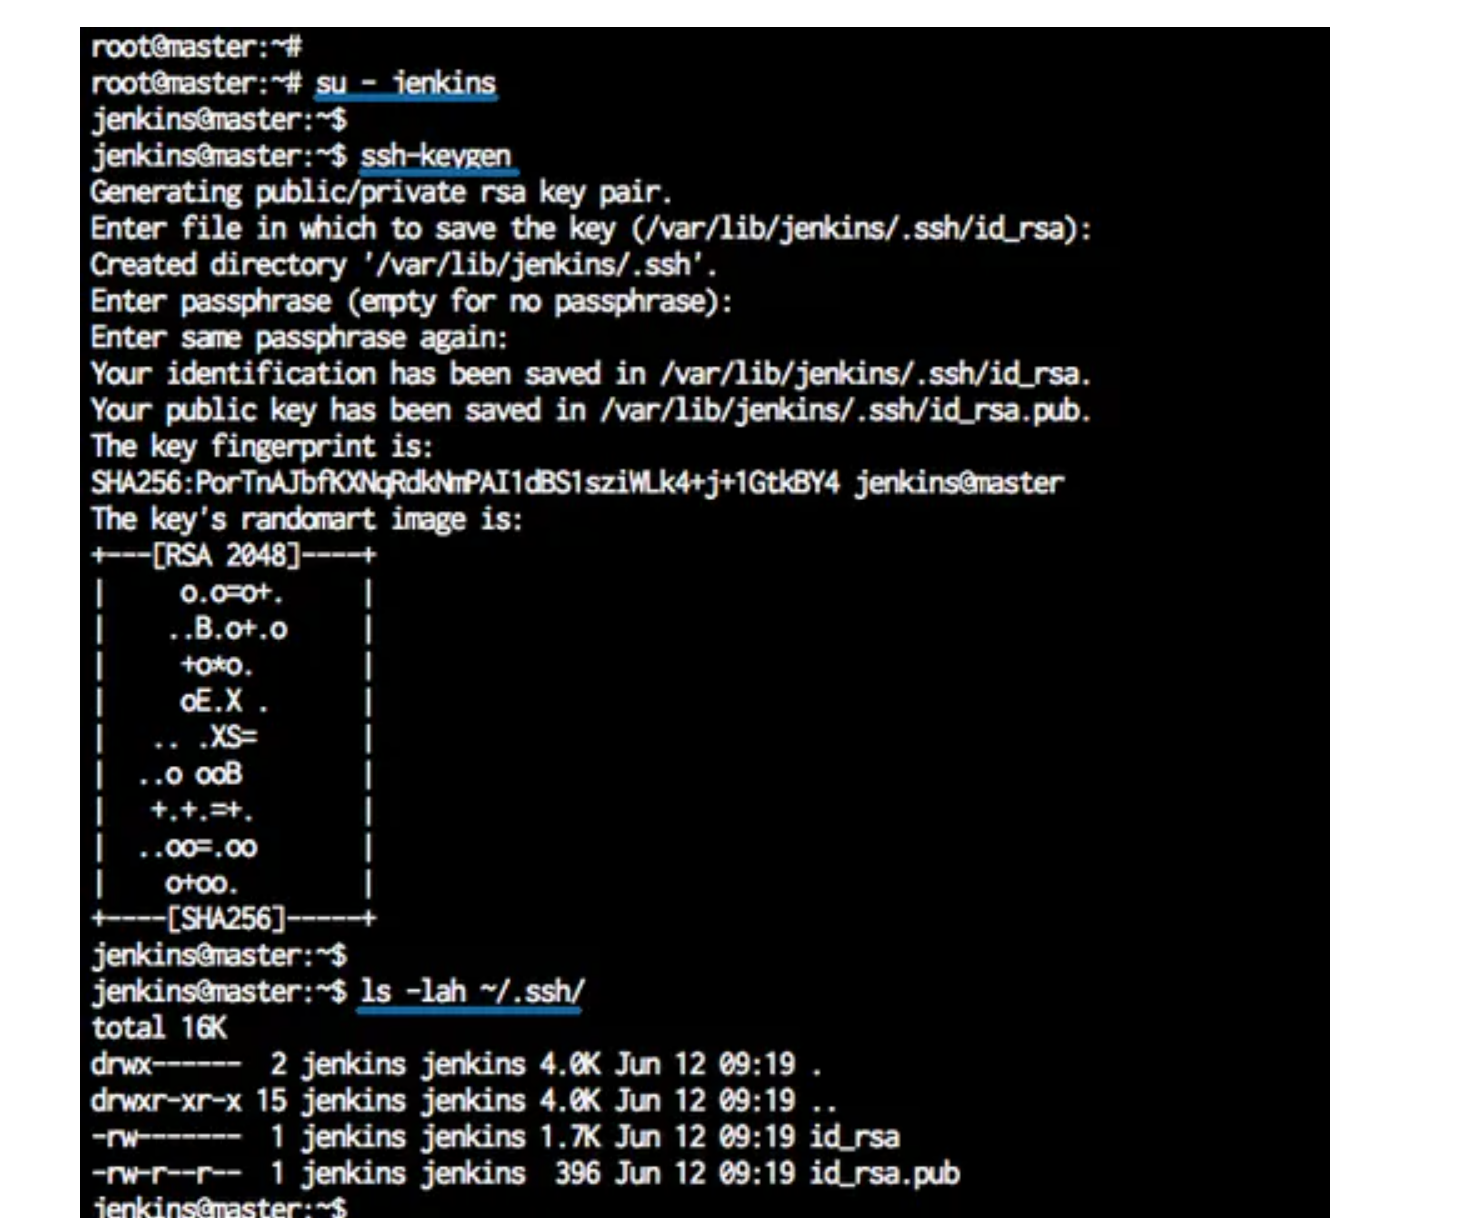
On the Jenkins master server, login to the Jenkins user and generate the ssh key.
|
1 2 |
<em>su - jenkins ssh-keygen</em> |
And you will get the ‘id_rsa’ private and ‘id_rsa.pub’ public key in the ‘.ssh’ directory.
Setup Credentials on Jenkins
Open your Jenkins dashboard and click on the ‘Credentials’ menu on the left.
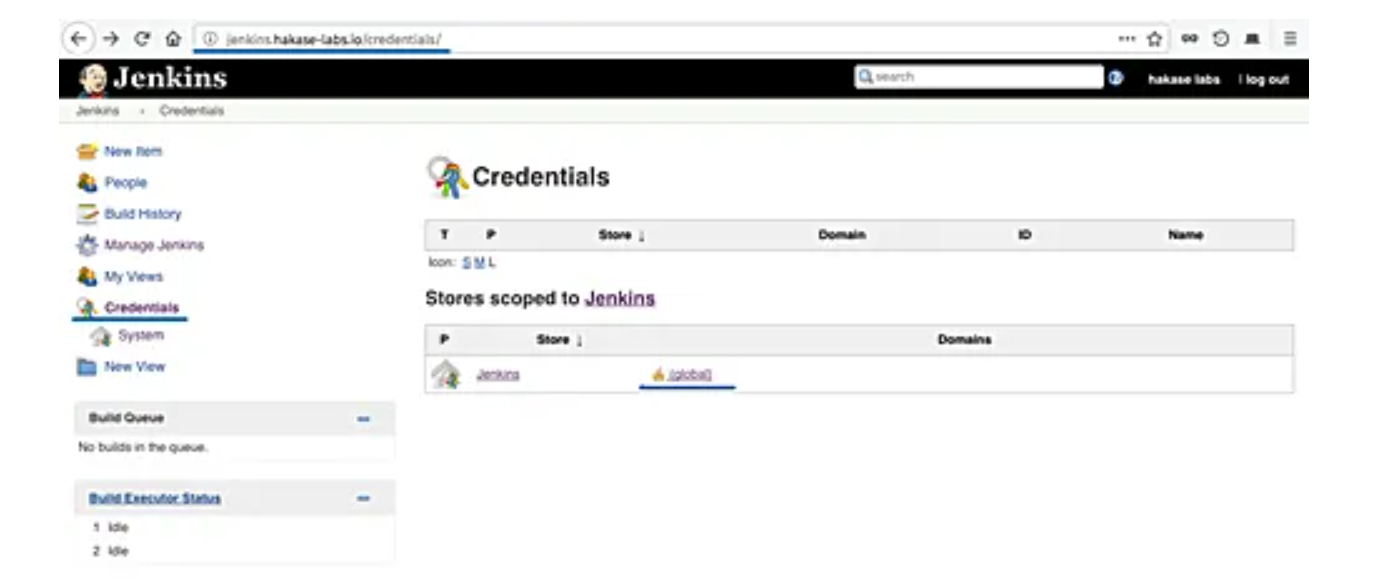
And click the ‘global’ domain link.
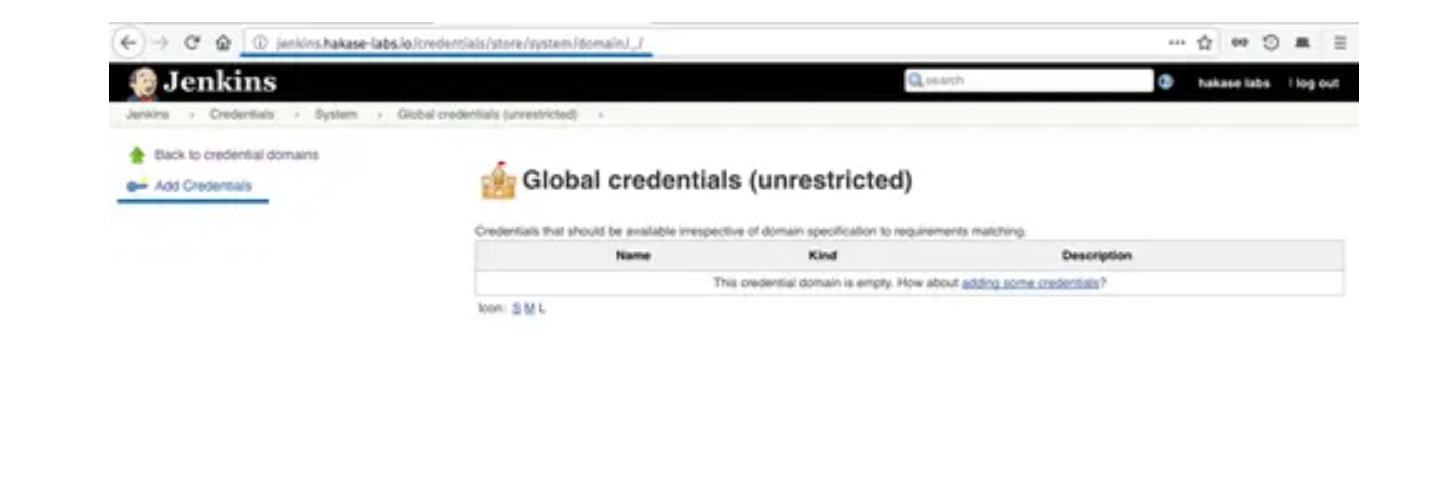
Now click ‘Add Credentials’.
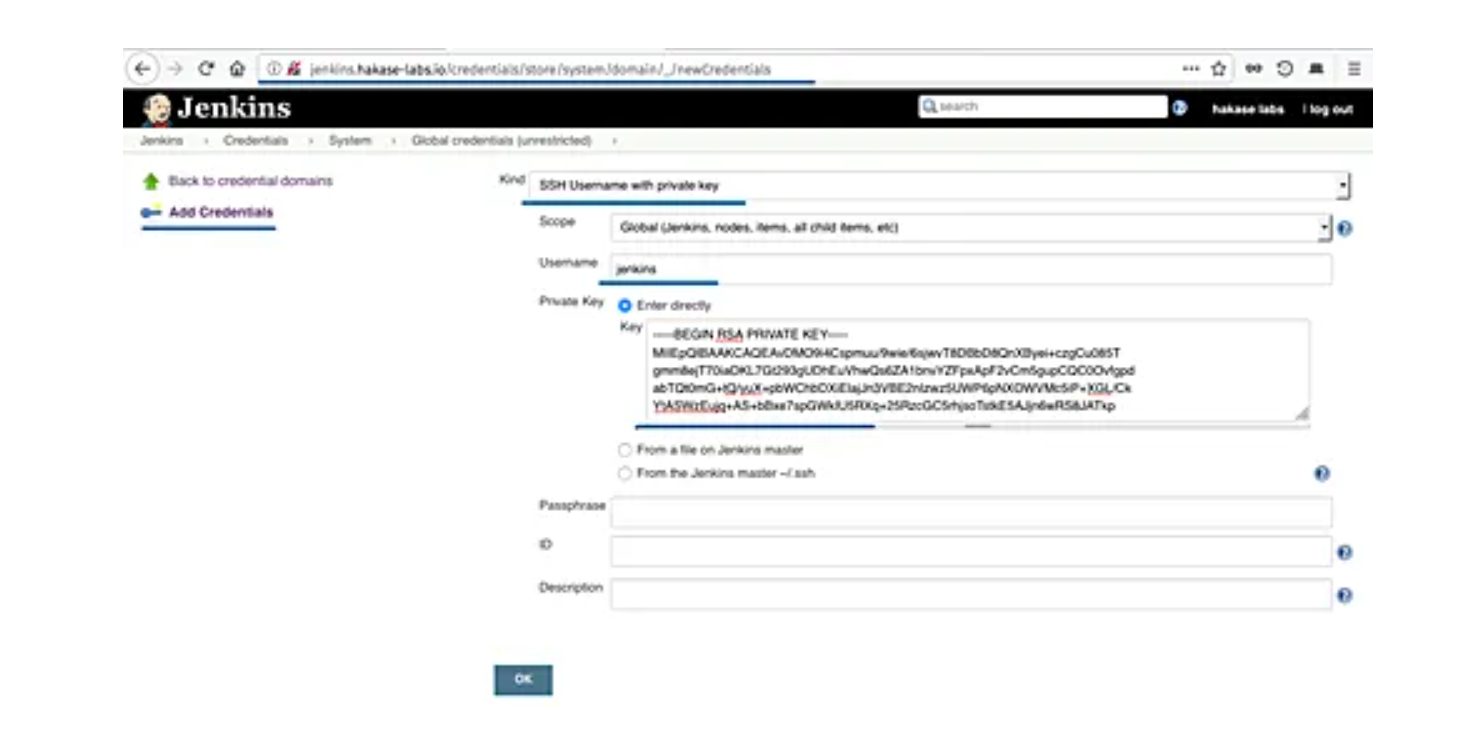
Now choose the authentication method.
- Kind: SSH Username with private key
- Scope: Global
- Username: jenkins
- Private key: Enter directly and paste the ‘id_rsa’ private key of Jenkins user from the master server.
- Click ‘OK’.
And the Jenkins credential with ssh auth key method have been created.
Set up Slave Nodes
Now we will setup slave nodes server by installing java on those server, and create a new Jenkins user.
Install Java
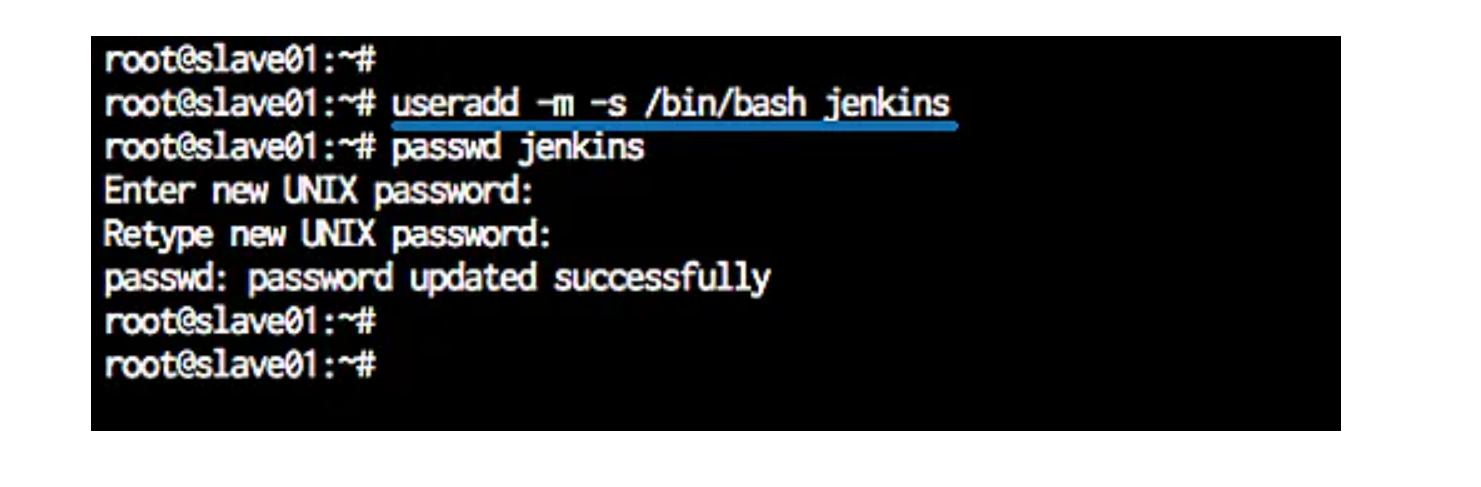
Now add the ‘Jenkins’ user to all agent nodes.
|
1 2 |
<em>useradd -m -s /bin/bash jenkins passwd Jenkins</em> |
The ‘Jenkins’ user for agent nodes has been created.
Copy the SSH Key from Master to Slave
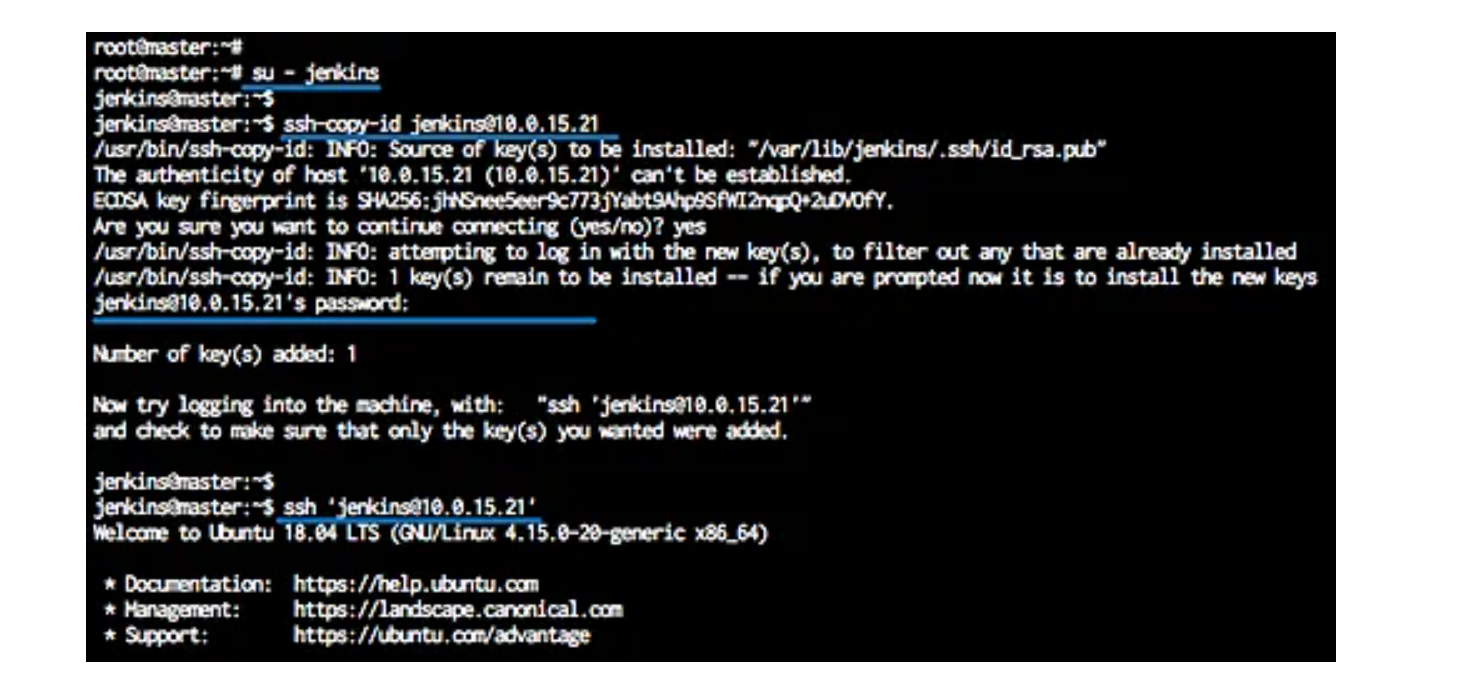
Next, we need to upload the key ‘id_rsa.pub’ from the master to slave server nodes. We need to upload to each server nodes using ‘ssh-copy-id’ command as below.
|
1 2 |
<em>ssh-copy-id jenkins@10.0.15.21 ssh-copy-id jenkins@10.0.15.22</em> |
Type the Jenkins user password.
The ssh key ‘id_rsa.pub’ has been uploaded to all agent nodes.
Add New Slave Nodes
On the Jenkins dashboard, click the ‘Manage Jenkins’ menu, and click ‘Manage Nodes’.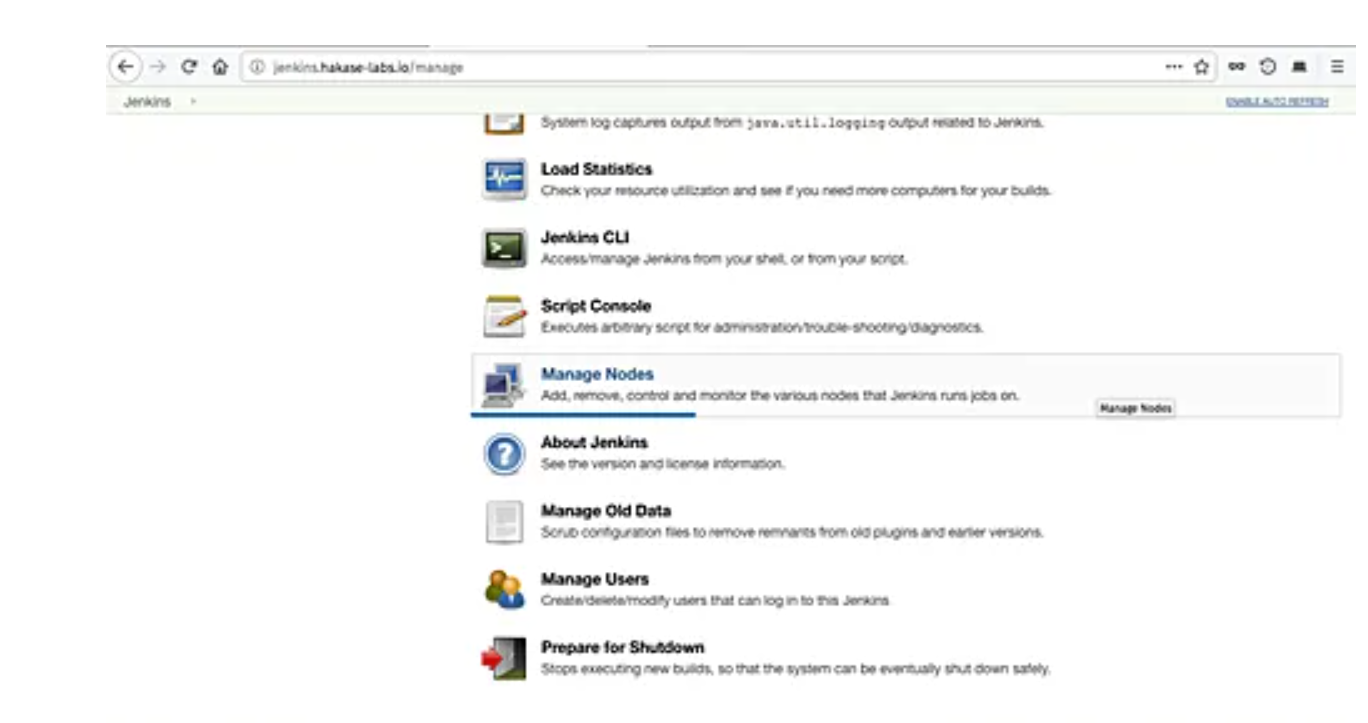
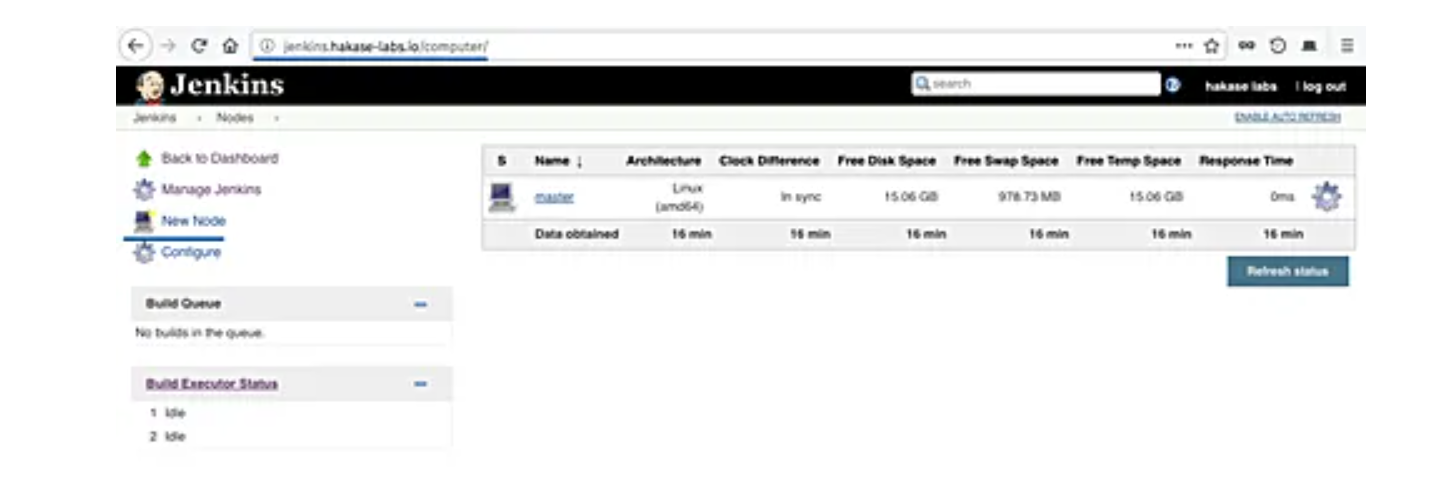
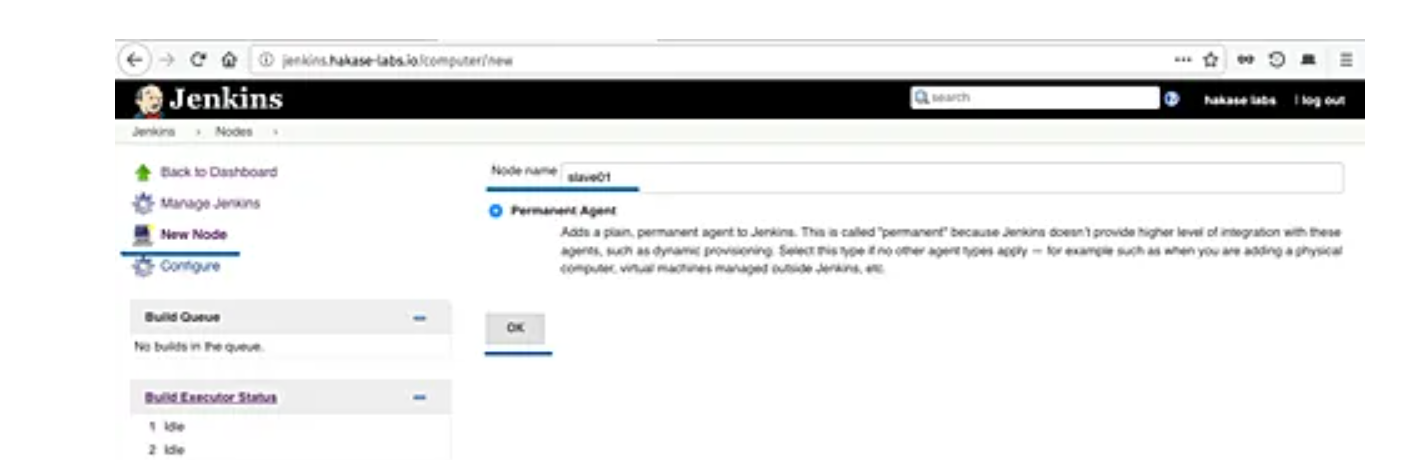
Click the ‘New Node’.
Type the node name ‘slave01’, choose the ‘permanent agent’, and click ‘OK’.
Now type node information details.
- Description: slave01 node agent server
- Remote root directory: /home/jenkins
- Labels: slave01
- Launch method: Launch slave agent via SSH, type the host ip address
- ‘10.0.15.21’, choose the authentication using ‘Jenkins’ credential.
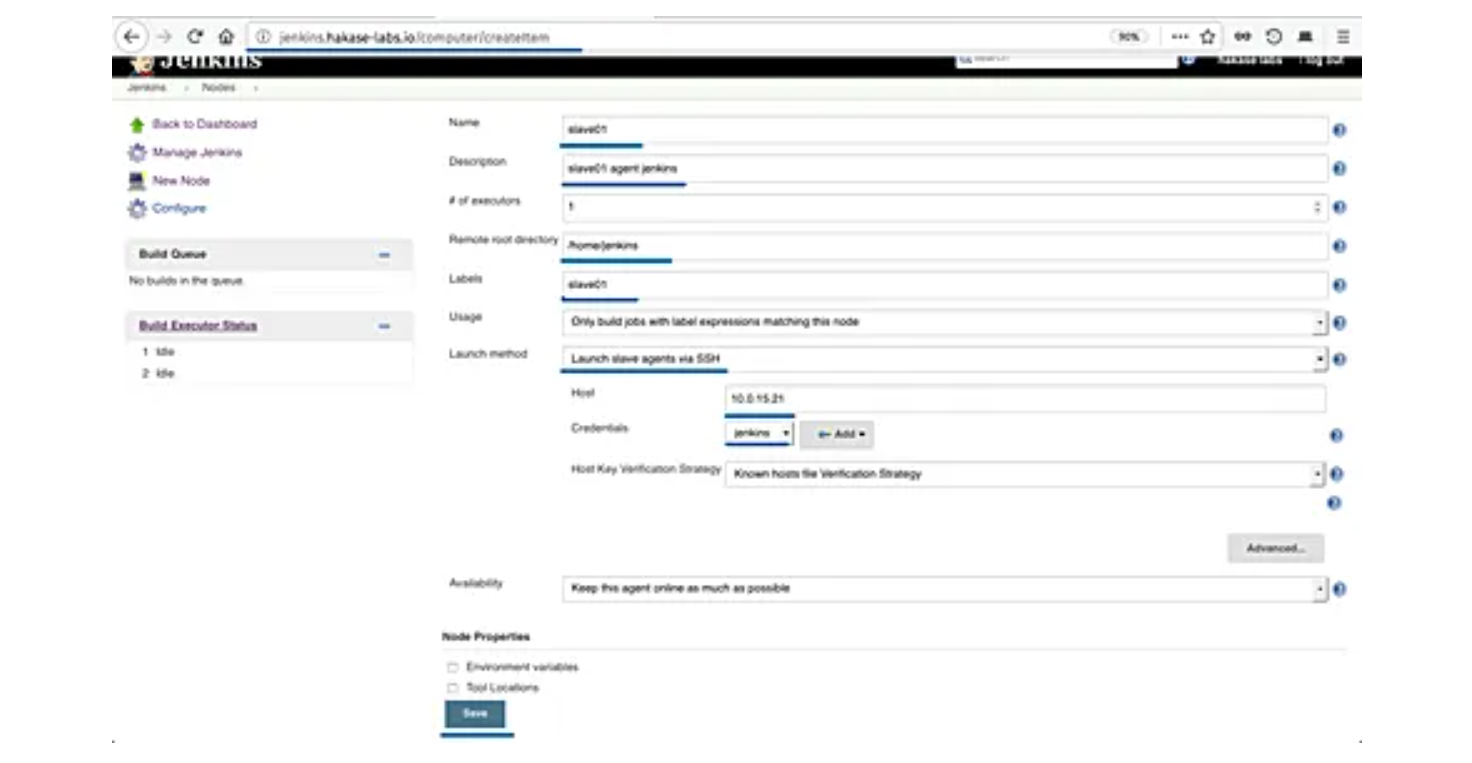
Now click ‘Save’ button and wait for the master server to connect to all agent nodes and launch the agent services.
Below are the results when the master server is connected to all agent nodes.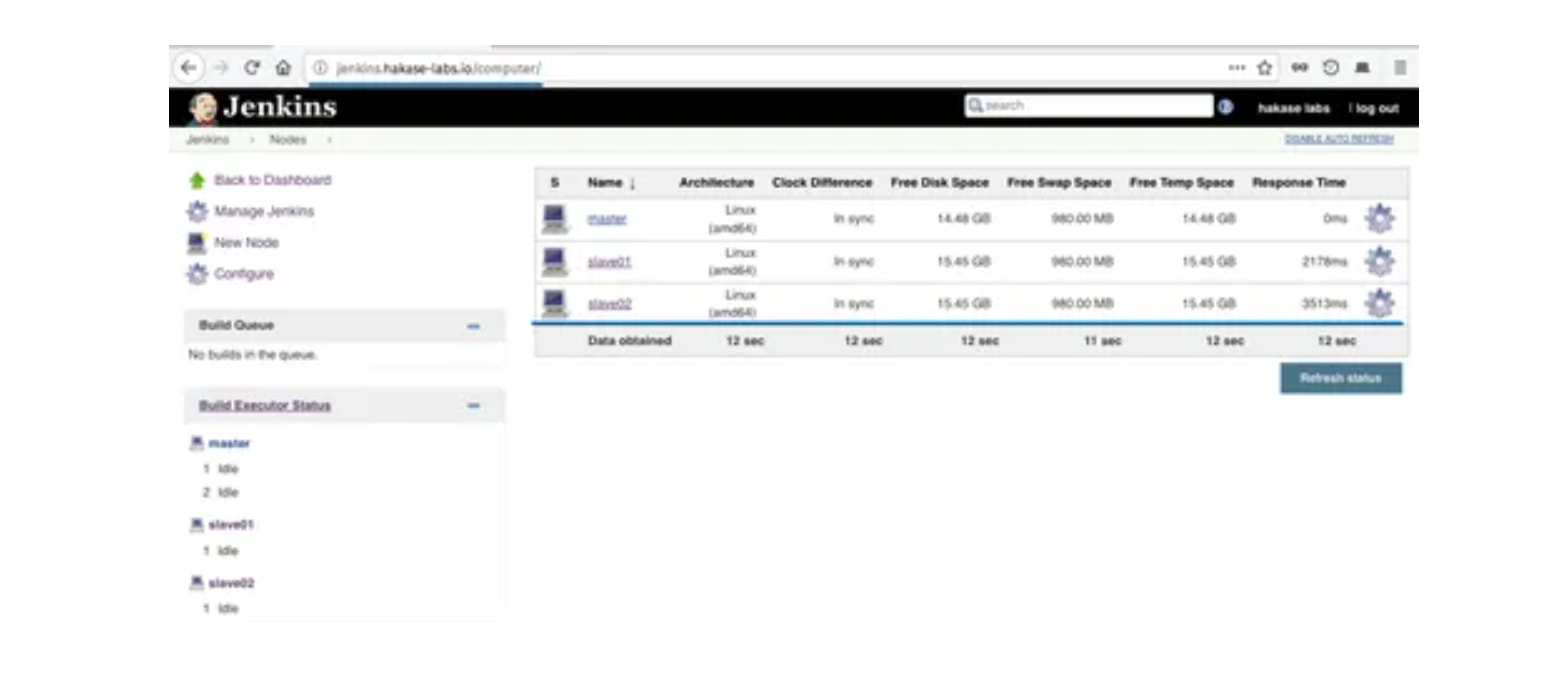
Jenkins slave nodes has been added to the master server.
Building the Project on Slave Nodes
Now that our master and slave nodes are ready, we’ll discuss the steps for building the project on the slave node.
For this, we start by clicking “New Item” in the top left corner of the dashboard.
Next, we need to enter the name of our project in the “Enter an item name” field and select the “Pipeline project”, and then click the “OK” button.
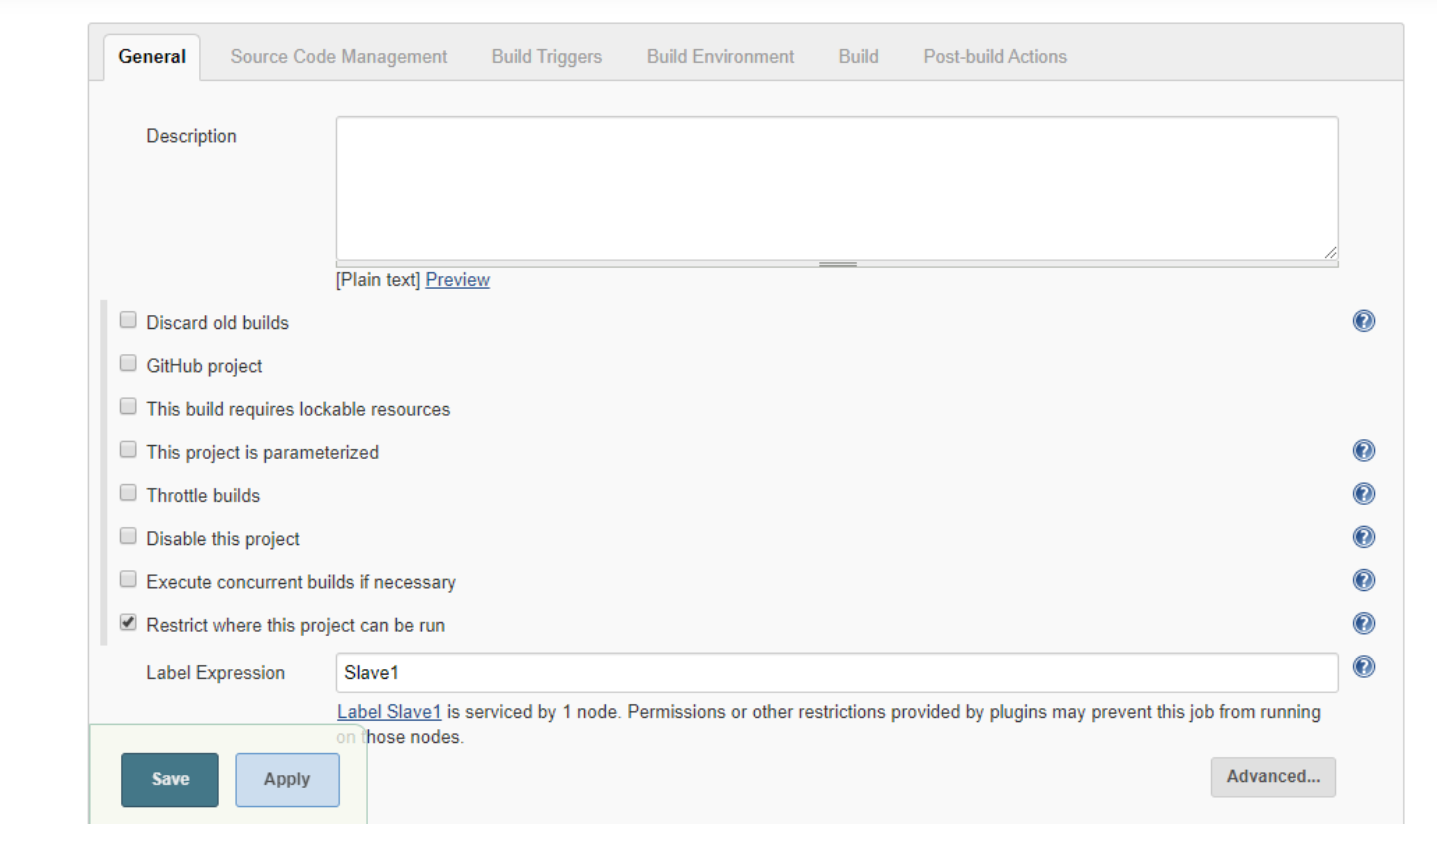
Open this job and click on configure. Now here in the General section, click on “Restrict where this project can be run”. Here in Label Expression, enter the name of the slave and save it. Now click on Build now and see the output of this job. Everything is correct you will see the output as Success.
Using Pipelines
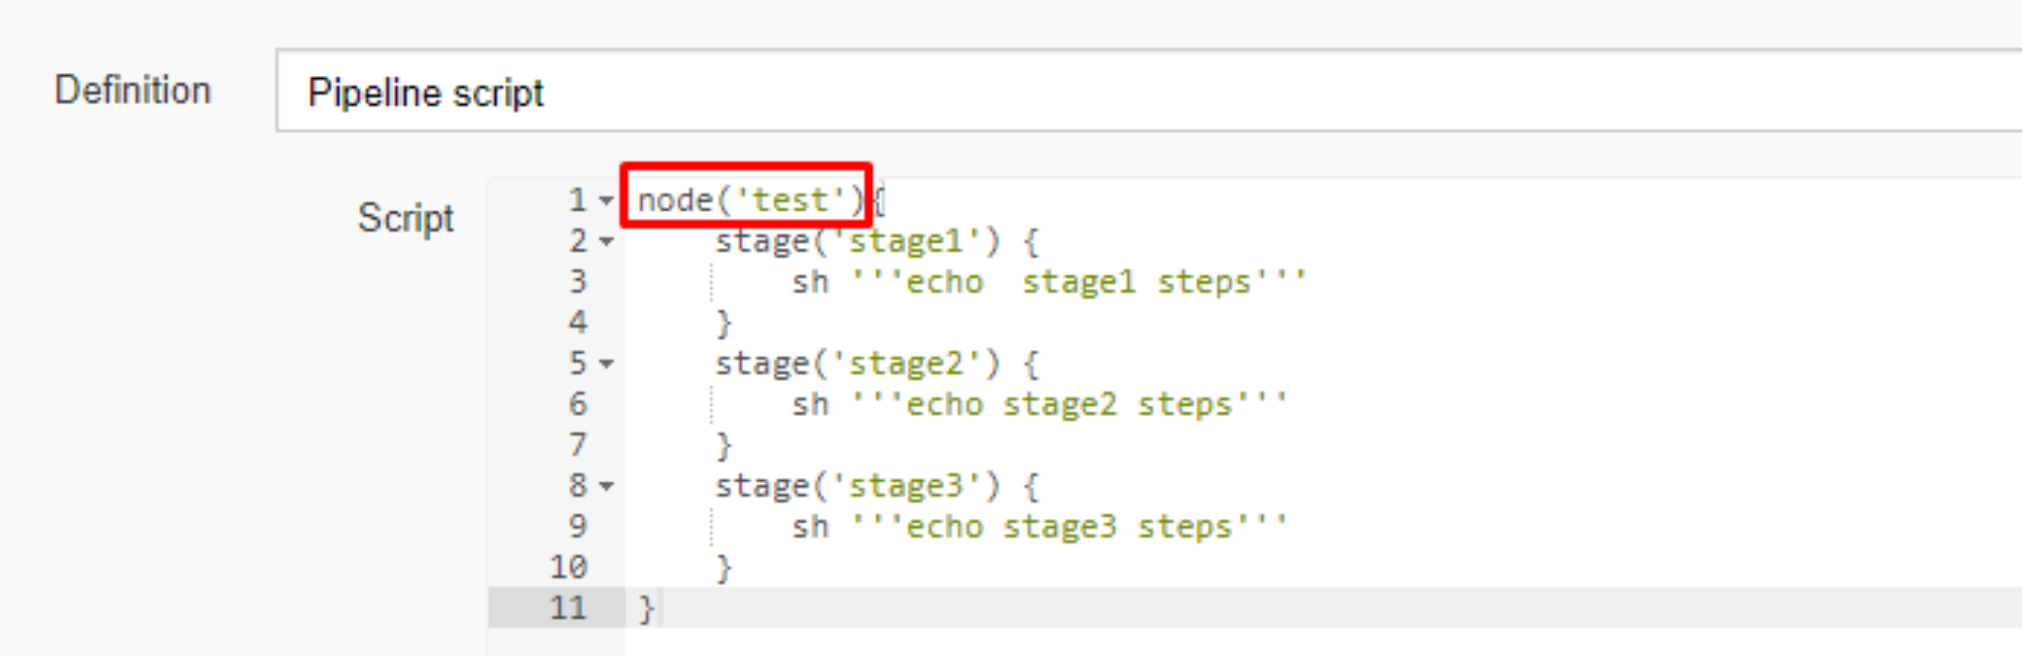
On the left pane, click the Build Now button to execute your Pipeline
After Pipeline execution is completed, the Pipeline view will be as shown below.
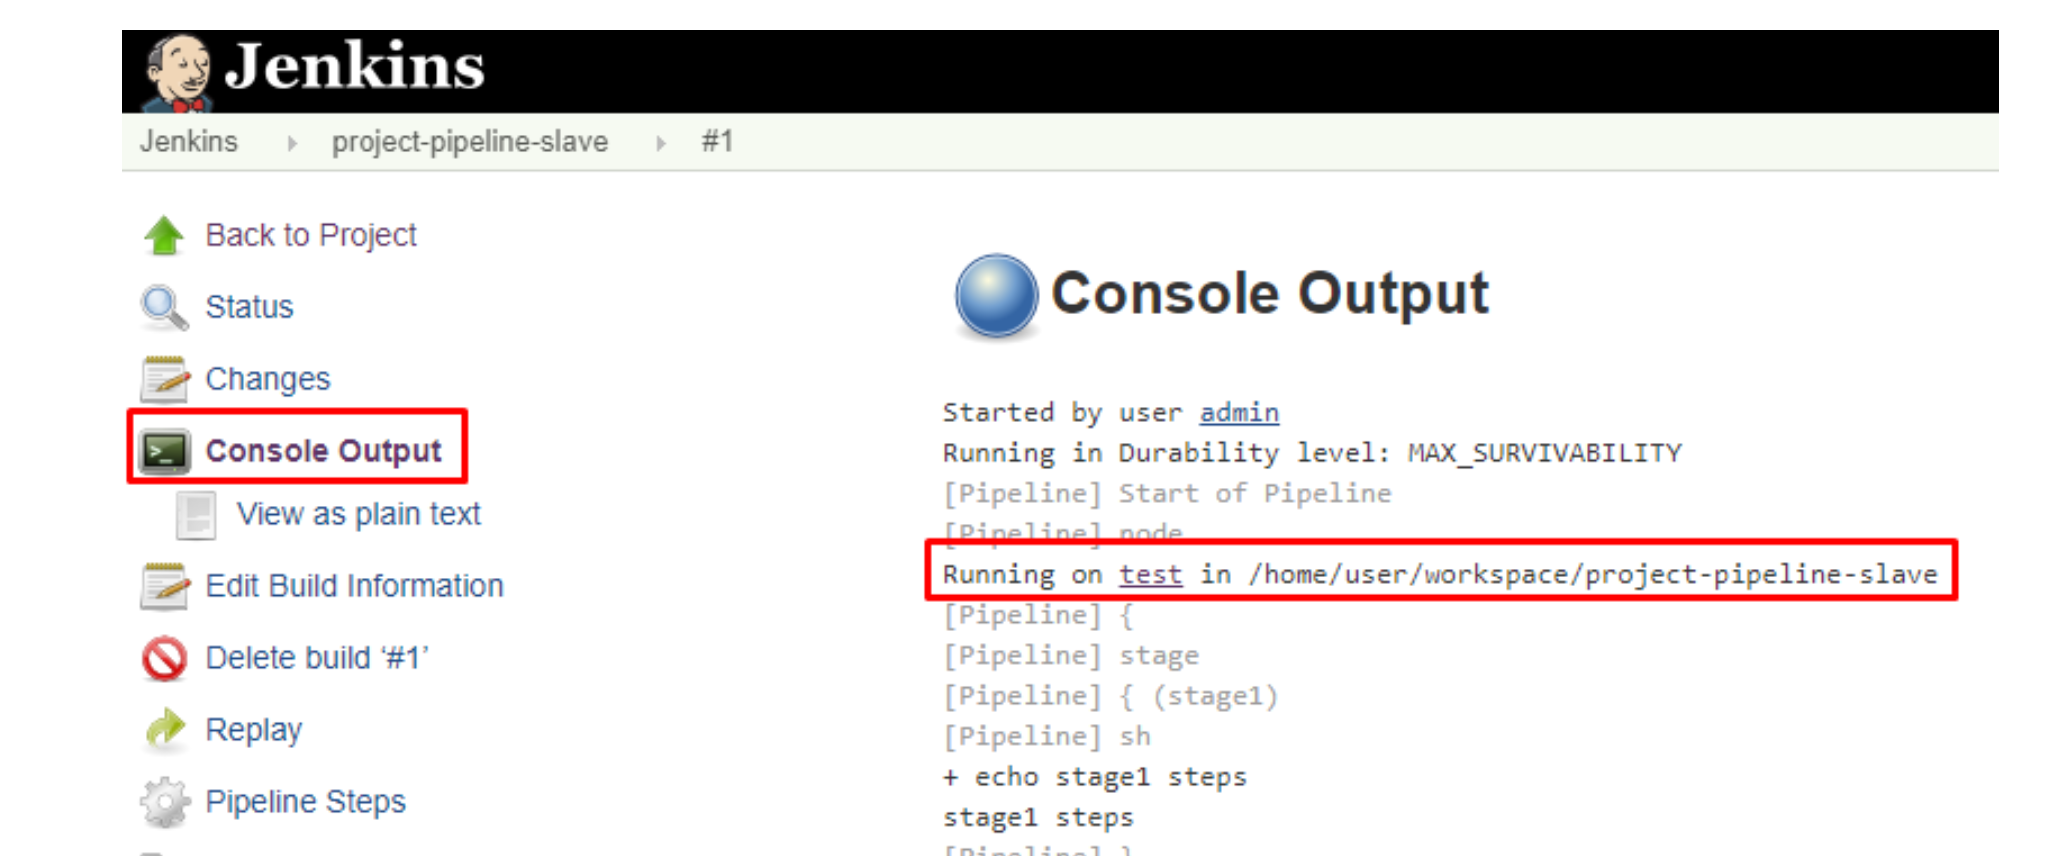
We can verify the history of executed build under the Build History by clicking the build number.
Click on build number and select Console Output. Here you can see that the pipeline ran on a slave machine.